Knitting tulle. Crochet combination dress for girls in three colors. Tulle skirt
A tulle skirt is an almost universal piece of clothing. It would seem, where can you put it on? Depending on the style, color and accessories, it can be worn to a party, for a walk, on a date and almost anywhere! A big plus is that it is quite easy to sew. And even if you have never sewed clothes, you will definitely succeed in this wardrobe item!
Master class No. 1: fluffy tulle skirt with a cover
Before you buy the material and start cutting it, you need to take two measurements: waist circumference and skirt length (for example, from waist to knee). Next, you will have to make some calculations:
- Add 5 cm to the length of the skirt.
- Divide your waist circumference by 3.14, and then divide that number by 2. This will give you your waist radius.
- Add both values. Let's denote this number by the letter A.
If the addition result is less than or equal to 27, you will need a piece of soft tulle measuring approximately 6x1.7 meters
If the addition result is more than 27, buy 10-12 meters of tulle.
You will also need fabric for the base cover (it is better if it does not stretch and fray). To find out the length of the cut, multiply your total waist circumference by 1.5, and its width will depend on how long you want the cover to be.
Additional materials and tools:
- Wide elastic band, the length of which is equal to the waist circumference + 2 cm
- Measuring tape or tailor's meter
- Scissors
- Pins
- Sewing machine and thread to match the fabric
- Tracing paper
You can soften harsh tulle by washing, drying and ironing it.
Operating procedure:
1. Draw a semicircular pattern on tracing paper:
- the white arrow indicates the radius of your waist
- the black arrow indicates the length of the skirt
2. Cut out the template.
3. Fold the tulle piece in half lengthwise if the number A is less than or equal to 27. If it is greater than 27, skip this step.
4. Now fold the piece in half, like a book, and in half again to make 8 layers of fabric.
5. Pin all the layers together along the top edge of the stack and cut out all the pieces at once.
6. You should have 4 identical circles with a hole in the middle. If you don't have enough fabric to make full circles, you can cut out semicircular pieces and sew them in pairs.
7. Place the two circles together and baste them together along the edge of the center hole. Do the same with the remaining two circles.
8. Place both pieces on top of each other and mark with pins four points around the waist - on the sides, in front and behind. The pins should divide the circle into 4 equal parts.
9. Bring the ends of the elastic together and sew them with an overlap (2cm). Mark 4 dots on the elastic that match the marks on the skirt.
10. Fasten the tulle to the inside of the elastic and sew with a zigzag stitch.
11. Take a rectangular piece of fabric for the cover, fold it in half and sew the side edge. If the fabric frays, pre-treat its bottom edge with an overlocker.
12. Place a basting stitch along the top edge of the resulting “pipe”, then tighten the thread until the cover fits snugly around your waist.
13. Sew the cover to the elastic, placing it under a layer of tulle. Trim the fabric along the bottom edge so that it is not visible.
Your skirt is ready!
Lesson No. 2: children's tulle skirt
Multiply the waist circumference by 2, add 5 cm to the length, and you will find out the cut size you will need for the base.
Now you can get started:
1. Sew both lengthwise sides of your cut using a zigzag stitch.
2. Lay the fabric out on the table. Fold the top edge in 2cm and smooth out the fold. Don't stitch the edge!
Set this piece aside for now.
3. Lay out a piece of tulle approximately 2.5 m long in front of you.
Cut it into ribbons of equal width (approximately 10-12cm). For each frill you will need 4 ribbons.
4. Sew 4 fragments into one long ribbon. Use a basting stitch so that when the work is finished the threads can be pulled out.
5. To make ruffles, set the maximum tension and maximum stitch length.
6. Fold one tulle ribbon in half lengthwise and stitch along the fold line. Repeat this process with all other ribbons.
7. Let's return to the blank for the base. Lay it out so that the ironed fold is under the fabric, on the table side.
8. Distribute the ruffles throughout the fabric and secure each ribbon. The first row can be laid along the lower edge of the fold (it can be felt through the fabric), and the rest can be placed parallel to the first, maintaining a certain interval.
9. Stitch each frill along its center line.
10. Unfold the fold on the base and fold the base in half with the frills facing inward. Trim off any excess tape on the sides if necessary, carefully bring the edges of the base together and stitch.
11. Turn the edge of the fabric back towards you along the fold line and stitch along the bottom edge. Be careful not to overstitch the frill!
12. Turn the skirt right side out. Now you can pull the basting stitches out of the ruffles and thread the elastic into the waistband.
Instruction No. 3: model with large frills
This model is somewhat reminiscent of the previous one, but the frills here are larger and are located one above the other, like the scales of a pine cone.
1. Measure your waist circumference and multiply it by 3. Also measure the length of your skirt.
2. Cut out a rectangle for the base and overlock its top and bottom edges.
3. Turn the bottom edge of the base under and hem it.
4. To make scales, you must cut the tulle into strips of equal length and width (focus on the size of the skirt).
5. Next, for clarity, we will use a denser fabric, but remember that we are talking about working with tulle.
Fold each strip in half. Do not smooth the fold so as not to lose the airy effect.
6. Having laid out the base on the table, take one of the parts and gather the forked edge into a “bun”. Attach the piece to the base in the place where the first scale should be and secure it with a pin. Place the next scale under the first, and so on until the bottom edge of the base.
When determining the location of the first flake, do not forget that you need to leave a little space along the upper edge of the base to trim it and insert the elastic inside.
7. If necessary, adjust the location of the scales, and then sew them to the base.
8. Having completed the first vertical row, proceed to the second, then to the third, until the scales cover the entire base.
10. Fold the top edge of the warp towards you and hem it, leaving enough space for the elastic.
11. Insert the elastic and overlap the ends.
Master class No. 4: seamless skirt
You will need:
- At least 10 meters of tulle about 120cm wide
- A strip of fabric, the length of which is equal to the circumference of your waist + 10 cm, and the width is approximately 13 cm.
- A wide ribbon, the length of which is equal to the circumference of your waist + ties.
Operating procedure:
1. Lay out a roll of tulle on the table.
2. Measure 18cm from its outer edge and mark this point.
3. Continue making marks every 18cm until you reach the opposite edge of the cut.
4. Using the marks as a guide, cut the fabric into strips.
5. Take the strips one by one and, folding them in half, tie them to the tape as follows:
6. The closer the knots are, the fuller the skirt will be. Continue until you have filled the entire tape.
7. Tie the ends of the ribbon.
You can leave the skirt as is, using the ends of the ribbon as ties each time you wear it, or you can create a belt that will better define your waist and hide the knots.
8. Fold the strip of fabric you chose for the waistband in half and mark its center.
9. Do the same with the skirt - mark its middle.
10. Connect the fabric and the skirt at the marked points.
12. Turn the skirt over and place a basting stitch just under the knots, catching the edge of the fabric that is now underneath, on the table side.
<13. Подрубите непришитые края ткани со всех сторон.
Lesson #5: layered tulle skirt with belt
For this model you will need at least 6 m of tulle (with a width of about 150 cm) and a wide silk ribbon for the belt.
Operating procedure:
1. Cut a piece of tulle into fragments 2 m long and fold each fragment in half lengthwise.
2. Cut each piece along the fold to make 6 separate pieces, each 2m long.
3. Alternately fold and overlap the short sides of each piece, leaving approximately 20 cm from the top edge unstitched.
4. Now stack all the pieces on top of each other so that the seams match. Pin all layers along the top edge.
5. Tie the ends of two tight threads, then thread each of the loose ends into a separate needle. Make two parallel basting stitches through all layers of tulle, from one edge to the other.
6. Then gently pull the fabric towards the knot, distributing the gathers evenly. Stop when the length of the gathered fabric is equal to your waist and secure the threads to keep the folds in place.
7. Take a wide silk or satin ribbon and sew it to the waistband of the skirt from one edge of the open slit to the other in a circular manner (see previous project). Leave long ends on both sides for tying a bow - it will not only decorate the product, but also hide the cut.
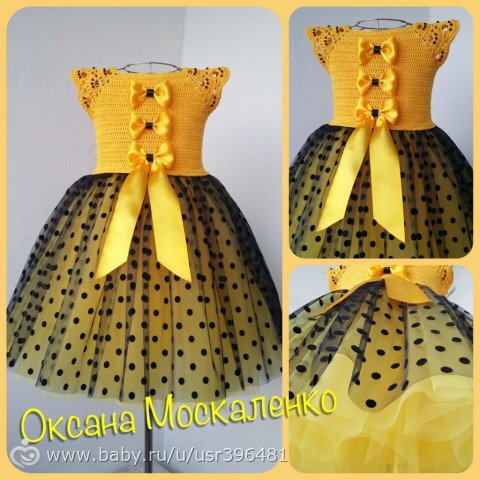
For 4-5 years old, an elegant dress: a crocheted yoke and a tulle skirt. Square yoke with raglan: Pattern report = 6p+1 This means that each raglan line should be divided into 6 loops + 1 for symmetry. For example: shelf 2 reports = (6*2)+1=13 loops; sleeve 4 reports = (6*4)+1= 25 loops, before (front + shelf) 4 reports = (6*4)+1 = 25, etc. If you need to increase the number of loops, then add loops per 1 report per shelves and 2 on the front, on the sleeves at your discretion (1 or 2) For the dress I dialed 165 air. loops 2nd row: 18dc + 1dc, 2v. p., 1dc + 47 dc + 1 dc, 2 v. p., 1dc + 35dc + 1dc, 2 v. p., 1dc + 47dc + 1dc, 2 v. p., 1dc+18dc (+1dc is an increase, indicated in this picture by gray dc) Do-it-yourself tulle skirt Before you buy the material and start cutting it, you need to take two measurements: waist circumference and length of the skirt (for example, from the waist to the knee). Next, you will have to make some calculations: Add 5 cm to the length of the skirt. Divide your waist circumference by 3.14, and then divide that number by 2. This will give you your waist radius. Add both values. Let's denote this number with the letter A. If the addition result is less than or equal to 27, you will need a piece of soft tulle measuring approximately 6x1.7 meters. If the addition result is greater than 27, buy 10-12 meters of tulle. You will also need fabric for the base cover (it is better if it does not stretch and fray). To find out the length of the cut, multiply your total waist circumference by 1.5, and its width will depend on how long you want the cover to be. Additional materials and tools: Wide elastic band, the length of which is equal to the waist circumference + 2 cm Measuring tape or tailor's meter Scissors Pins Sewing machine and threads to match the fabric Tracing paper You can soften harsh tulle by washing, drying and ironing it. Procedure: 1. Draw a semicircular pattern on tracing paper: - the white arrow indicates the radius of your waist - the black arrow indicates the length of the skirt 2. Cut out the template. 3. Fold the tulle piece in half lengthwise if the number A is less than or equal to 27. If it is greater than 27, skip this step. 4. Now fold the piece in half, like a book, and in half again to make 8 layers of fabric. 5. Pin all the layers together along the top edge of the stack and cut out all the pieces at once. 6. You should have 4 identical circles with a hole in the middle. If you don't have enough fabric to make full circles, you can cut out semicircular pieces and sew them in pairs. 7. Place the two circles together and baste them together along the edge of the center hole. Do the same with the remaining two circles. 8. Place both pieces on top of each other and mark with pins four points around the waist - on the sides, in front and behind. The pins should divide the circle into 4 equal parts. 9. Bring the ends of the elastic together and sew them with an overlap (2cm). Mark 4 dots on the elastic that match the marks on the skirt. 10. Fasten the tulle to the inside of the elastic and sew with a zigzag stitch. 11. Take a rectangular piece of fabric for the cover, fold it in half and sew the side edge. If the fabric frays, pre-treat its bottom edge with an overlocker. 12. Place a basting stitch along the top edge of the resulting “pipe”, then tighten the thread until the cover fits snugly around your waist. 13. Sew the cover to the elastic, placing it under the tulle layer. Trim the fabric along the bottom edge so that it is not visible. Your skirt is ready!
Every girl wants to have many different beautiful dresses in her wardrobe. To have both casual and dressy dresses. It will not be difficult for needlewomen to make beautiful outfits for their little princesses with their own hands. A combined dress for girls with a knitted top and fabric bottom turns out great.
Variety of models
The huge advantage of combined dresses is that they are very simple to make and look amazing. And what a variety of models and styles can be made using knitting and fabric!
Such wonderful outfits are suitable both for home and for a holiday. The main thing is to use your imagination and boldly implement your ideas. Even standard models will become a masterpiece if you choose an interesting fabric for the hem and knit the yoke with an openwork pattern. Also, do not forget about decorative decorations for outfits. Ribbons, bows, flowers, embroidery, brooches, beads, lace, ruffles - all this will make the dress of a little fashionista exclusive.
In everyday models, the girl will be very comfortable and beautiful. For the bottom, small pieces of fabric sewn together, inexpensive fabric, are suitable.


Elegant dresses will turn a girl into a real princess, because they are so magnificent that you can admire them for a very long time. If you make a fluffy petticoat from tulle, choose a beautiful and interesting fabric, use openwork knitting, you will get a chic festive dress.


Types of yokes
The top of the dress is made of knitted yokes. There are three types of yokes: square, round and classic.

Before starting work, you need to take measurements and determine the knitting density. Measurements are taken for neck girth and chest girth. The sample is knitted, washed, dried, steamed and the number of stitches per centimeter is measured.
Let's look at how to do each type correctly.
The square yoke has a raglan sleeve. To describe the construction, double crochet is used. If the yoke is made with a pattern, then the report of the pattern must also be taken into account. You should pay attention to the width of the neck. If it is smaller than the volume of the head, then you will need to make a fastener at the back and divide the back of the yoke into two halves at the top. If a fastener is not provided, then you need to add a couple of centimeters for the neckline so that the dress can be easily removed and put on.


Before knitting, convert the centimeters into stitches and knit a cast-on row from the required number of stitches. Then the number of loops for each part of the yoke is calculated. Immediately subtract 4 loops for raglan. The remaining amount should be divided into 4. Two parts for the sleeves and one each for the front and back. If there is a fastener at the back, then the number of loops should be divided by 2. To determine the armhole of the sleeve, you need to add 5-6 cm to the half-circumference of the chest for girls under one year old and 7 cm for girls older. After the yoke to the armhole and sleeves are knitted, the knitting is closed under them and knitted in a circle to the end.
Below are knitting patterns for a square yoke.


To knit a round yoke, measure the neck circumference and chest circumference. Knitting occurs in the round until the width to the armhole is knitted. In the armhole area, as with a square yoke, the knitting is closed and knitted in the round. If the sleeves have reached the required length, but the yoke still needs to be knitted, then the knitting is closed under the armholes and the yoke is knitted in turning rows. Or we continue the pattern, but along the front and back.


Schemes of patterns for round yokes are offered below.


A classic yoke can be knitted to the hips, waist or chest. In order to make it, you need to create a pattern. The figure shows figurative parameters. Instead, you need to put the values of the measurements taken.

You can simplify the construction of the pattern by choosing a T-shirt or tank top that fits your child.

Or you can change the style a little and move the straps, increase or decrease the armholes.


The yoke can be knitted as a beautiful top and a dress skirt can be sewn to it. Makes a great outfit.


A classic yoke can be knitted using the following patterns.


For a younger baby
Let's make a wonderful dress for a girl of three or four years old. You can use your measurements and make a dress for an older or younger girl.

We will crochet a square yoke. Let's prepare the yarn and hook 2. The yarn and hook should match each other in thickness.

We will knit according to this pattern. The front and back will be made from double crochets, and the sleeves will be openwork.
We knit 142 air loops. We distribute them into 35 loops for the sleeves, 38 loops for the front and 17 loops for the two halves of the back, since there will be a fastener at the back.


When the sleeves are the desired length, we form armholes. We close the knitting under them and knit in the round. We will put a zipper at the back, so we don’t connect the back halves.


Along the neck we will make a binding by alternating double crochets and air loops. We will also attach the strips for sewing on the zipper.

Along the bottom you need to knit two rows with single crochets. This is necessary in order to sew the fabric between the main and these two rows. This will make the connection look neat.

Now let's start creating the bottom of the dress. To do this, smooth the fabric and measure the desired length. Don't forget to make indents for the seams. The skirt will be 30 cm. Allow 15 cm for the seams.

For the zipper, you also need to leave 1.5 cm at the seams.

We sew the back part and press the seams.

We overlay the bottom of the skirt.


The skirt will be gathered at the top. We make two lines along the second edge.

We assemble the top by tightening the thread at the top stitch.


Then we steam this seam. Insert the zipper. We thread a ribbon through the neckline. Tighten a little and tie bows.

We decorate the shelf with a beautiful ribbon bow. You can also knit a brooch of three colors and attach it to a shelf. We decorate the dress as your imagination tells you.

It turns out to be a wonderful combined dress for a beautiful girl.

Video on the topic of the article
In the video you can see how to create a beautiful combined dress.
Girls love dresses with full skirts, because in such dresses they seem like fairy-tale princesses. Therefore, dresses for girls made of tulle are very popular. You can buy such a dress, or you can make it yourself, even without sewing skills.
Tulle is a thin fabric that resembles a cobweb. But at the same time, it is a very durable material; it is practically impossible to tear it apart with your hands. Essentially, tulle is a mesh made from nylon threads.

Depending on the size of the mesh cells, materials of different degrees of rigidity are distinguished. The material can be soft, then long flowing skirts are sewn from it. And from a more rigid type of material you can make a tutu skirt.
Tulle is available in different colors; in addition, it can be decorated with sparkles, spraying, and prints.
When planning to purchase or sew a dress for a girl with a tulle skirt, be sure to pay attention to the quality of the material. Fabric produced in the European Union is ideal for children's clothing. It does not wrinkle and is soft enough, so it is comfortable to wear.

But tulle made in China is tougher. In addition, Chinese tulle does not meet fire safety requirements. When exposed to open fire, it bursts into flames. And eurofatin, thanks to the use of special technologies, begins to slowly smolder when exposed to fire.

When choosing a material, pay attention to the width of the fabric. To sew a regular skirt, you should choose a fabric 1.5-3 meters wide, but if you plan to make a tutu skirt, then it is more profitable to take narrow tulle, sold in rolls, then the strips will not have to be cut to width.
How to make a tutu skirt?
Almost all fluffy children's dresses made of tulle have a tutu skirt; it is also called a “tutu.” This is a multi-layered fluffy model, consisting of several (at least ten) layers of fabric.

Even mothers who don’t know how to sew can easily make a children’s skirt here with their own hands. You will need rolled tulle 10-15 cm wide and a wide elastic band for the belt.
You can take one-color tulle or buy several rolls of different colors, then the skirt will turn out to be colorful. Operating procedure:
- Let's measure the girl's waist and cut the elastic for the belt of the required length. This is a very important point, the belt should not be tight, but too loose will be uncomfortable;
- using a centimeter we determine the length of our future skirt, we determine it at will, but short skirts look better;
- cut the rolled tulle into strips, the length of which is twice the desired length of the skirt;
- We begin to tie strips of tulle to the elastic waistband, folding the strips of fabric in half. The more tightly the stripes are placed, the more magnificent the skirt will be. When making a variegated model, you need to alternate strips of tulle of different shades, achieving the desired pattern;
- after the elastic belt is completely covered with tulle ribbons, the skirt will be ready;
- If desired, you can further decorate the skirt using bows, satin ribbons, artificial flowers, etc.

What to wear with?
A homemade tutu skirt can easily be turned into an elegant dress. To do this you need to choose a beautiful top. It is best to wear such a skirt with leggings, as it is see-through. But you can do without leggings if you sew a petticoat from satin or other suitable fabric.

This outfit is suitable for a matinee in kindergarten or a home party. You can complement the set with tulle bows, decorating the girl’s hair with them.
Elegant dresses
For a special event, for example, a graduation party in kindergarten or elementary school, you will need a more elegant outfit than a homemade skirt made from tulle ribbons.

What types of elegant children's dresses made of tulle are there? A variety of models can be seen in the photo, this :
- outfits with multi-layer tutu skirts, but not in stripes, but in sun style;

- dresses made of satin and other dense fabrics with fluffy tulle petticoats. The petticoat is made longer than the skirt so that it is clearly visible. In addition, the petticoat may have a color contrasting with the color of the dress;
- dresses made of tulle in an A-shaped silhouette, knee-length or slightly lower, with a sheath and flowing one or two layers of tulle;

- dresses in the empire style, in which the overskirts are made of tulle. This dress can be made with a train, but you need to take into account that this detail may interfere with the girl’s movement. Therefore, the train should be short, and it could be pinned to the skirt or worn on the hand, putting a special loop on the wrist.
What to wear with?

Elegant dresses require elegant accessories. You will need neat shoes, white or just light-colored tights. You can decorate your hair with a lush bow or pick up a small hat with a tulle veil.


