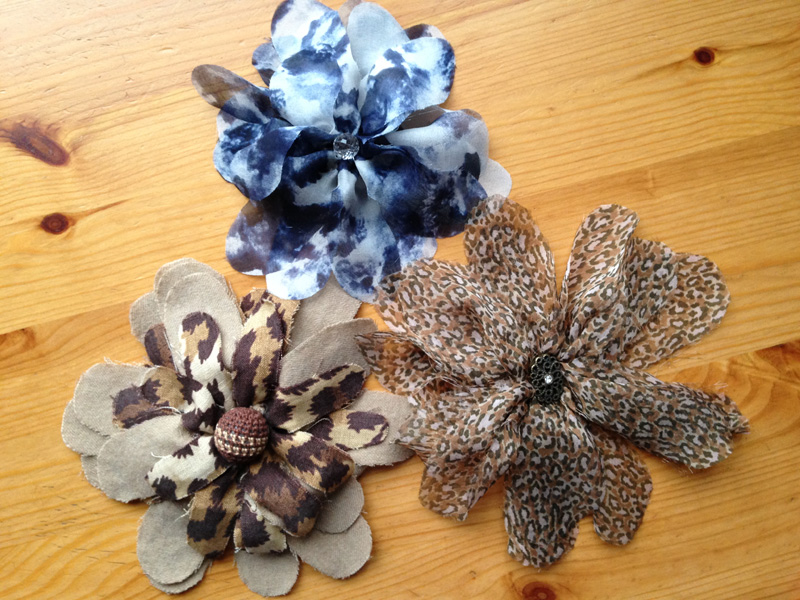
How to make a flower from fabric: a very simple way. Master Class. Knitted flowers How to make flowers from material
Flowers, both natural and artificial, have been one of the main decorations for the fair half of humanity at all times and generations. Living ones have one minus, they are not durable, but artificial ones are even better in this regard, so needlewomen using all kinds of fabrics, ribbons, felt, foamiran, paper, lace and other materials create different flowers with their own hands, some are even difficult to distinguish from real ones, others, on the contrary, are absolutely not like them, but are beautiful in their own way and reflect the creative view of the author.
Lush multi-layer organza flowers step by step master class.
For such a flower you will need organza, a needle and thread, beads with beads for the center of the flower, a lighter, scissors, petal templates of different sizes - 4.5 cm; 3.5 cm; 2.5 cm, pencil or tailor's chalk, pins.
You can also use sprigs of beads and wire, and tulle for decoration. But this is optional.

We fold the organza in several layers so that it does not move, and pin it together. We attach our petal templates and trace them with a pencil. To make it easier to cut them out, I also chop off each layer of petals separately with pins.


Now we scorch each petal along the edge with a lighter.

When all the petals are ready, take a needle and thread and stick the eye of the needle into the foam, it can be taken in reels with ribbons. The point of the needle should be on top!

Now we begin to string our petals on a needle, starting with the largest and ending with the smallest.

While stringing, we form a flower, distributing the petals accordingly.


When you have put all the petals on the needle, hold the flower, remove the needle from the foam and stitch through the entire flower several times, fixing the petals so that they do not fall apart.

We sew beads and beads into the middle


I twisted these beautiful branches from wire beads and beads

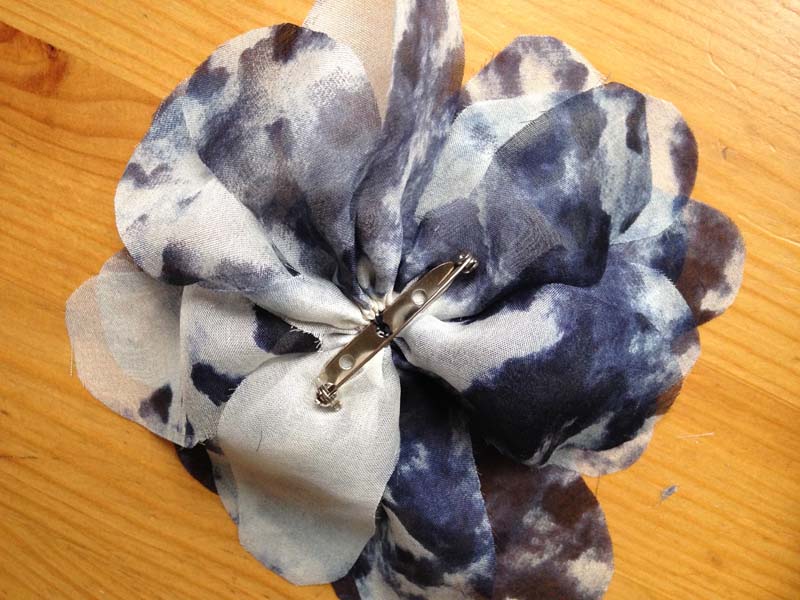
To secure the branches, I sew them on the back side of the flower. Then I glue it with hot glue and cover it with tulle. And finally we glue a hairpin - a brooch.


Flowers made of satin ribbons.
3 options for making roses from ribbons.
Fabric flowers

another option
Flowers made of felt, foamiran and paper.
I decided to combine this section because these materials are very similar in making flowers. For example, something that can be made from foamiran can be made from corrugated paper or felt, and vice versa.


- A strip of fabric at least 40-50 cm long and not 7-10 cm wide (you can use 2-3 stripes in one flower for splendor);
- Beautiful beads or buttons, you can also use beads;
- Sewing threads and needles;
- Brooch base;
- Tailor's scissors ()
Recommended fabrics: natural thin fabrics such as silk, chiffon, cambric, let, muslin and even dress wool.
How to make a flower from fabric with your own hands
Step 1

Fold a strip of fabric like an accordion (the size of the petals depends on the width of the fold);
Step 2

To prevent the accordion from falling apart in your hands, you can smooth out every wrinkle.
Step 3

Secure the resulting “accordion” with a tailor’s pin.
Step 4


Step back from one short section of 1.5-2 cm and cut out the shape of a petal.
Step 5


Cut the strip, iron and adjust the shape of the petals, if necessary.
Step 6

Gather the strip along the edge of the cut by hand using small stitches. Or sew a line with the maximum stitch length on a sewing machine.
Step 7

Pull the strip

Twisting it into a spiral to form a flower shape.
Step 8
Fasten the thread.Step 9

On the front side of the flower, sew a beautiful bead or button into the center.
Step 10
Sew the base for the brooch on the wrong side.

This is how you can easily and quickly make a flower out of fabric.
Petals and open sections of the strip do not need to be treated with anything.
Wear this beautiful accessory as a brooch or hair clip, or use it as decoration for a bag or belt. If you want to get petals of the same, even shape, you can first draw a template and use it to cut out the base for the flower.
The abundance of fashionable and affordable ways to decorate clothes and interior details creates enormous opportunities for creative self-realization, but often there is not enough time for delights or the object of decoration does not require or is not worth the colossal costs of serious decoration. It is in such cases that ingenuity and what is popularly called “grandmother’s secrets” come to the rescue - simple-to-use elements that can be made in a matter of minutes.
Volume applique
Plants using the appliqué technique have long become a common way of decorating clothes and accessories. A voluminous applique will help diversify a boring pattern, with which you can decorate the edge of the neckline of a dress, the hem of a coat or a handbag. Volumetric flowers look impressive if they are asymmetrically located on only one side of the product (for example, on the shoulder).
To decorate clothes with raised flowers you will need:
- stretch material;
- filler (sintepon).
 When planning to make convex flowers from fabric with your own hands, it is best to choose a material whose edge does not fray when trimmed. The loose edge should be trimmed with curly scissors and an allowance should be left for the hem.
- To ensure that the edges of the allowance do not turn away when attaching the applique to the base, they must first be ironed.
- You should not immediately attach the element along the entire contour - 3-4 cm will be needed for stuffing with filler.
- When the filler is laid, the hole can be stitched. You can add texture by placing decorative stitches around the center of the flower and on the leaves.
As a basis for convex plants, it is better to use dense material that is not prone to deformation.

Embroidery ribbons
Within the art of embroidery, there is a separate decorative direction, which involves creating pictures from ribbons sewn to a base. This is quite painstaking and difficult work, but using this principle you can decorate clothes even without experience.
You will need ribbons with the following width:
- 3 cm;
- 2 cm;
- 1 cm;
- a circle of fabric for the base;
- beads.
The optimal material for making such flora is satin ribbons or plain braid. An organza ribbon will also give an excellent result, but you need to get used to working with it.
- The tapes are folded one on top of the other so that their longitudinal axes coincide.
- Using a basting stitch, the ribbons are gathered together and slightly gathered.
- The bud is formed in a spiral and pinned to a round base. All that remains is to sew on the inflorescence, hide the unsightly ends of the ribbons and the decor with fabric flowers is ready.
This method can be used to create not only lush buds on the fabric, but also textured ornaments, and by “getting your hands on” you can dispense with the fastening element (base) and form a pattern on the product.

Volumetric printed decorations
Not limited to finishing clothes and accessories, you can make jewelry from flowers from fabric - a necklace, beads or bracelet. This simple idea from the point of view of production technology is based on the principle of sewing soft toys from two or more parts.
To make one printed flower you will need:
- nylon or dense (stretchy) fabric;
- padding polyester;
- decorative thread or thin lace;
- buttons;
- fastenings for jewelry (clasps, chain, connecting rings).
Using the template, you need to cut out two identical flowers from the fabric.
- Fold with the wrong sides facing out and sew along the edge (remembering to leave a gap for filling with padding polyester).
- Turn the product right side out and fill.
- Sew up the technological hole.
- Wind decorative thread crosswise in the recesses between the petals and decorate with buttons.
- Sew connecting rings and secure them to a chain or use pieces of a chain to connect several flowers in series into a complex decoration.
When working with nylon, you need to treat its edge with a candle because of the fabric’s tendency to fray excessively. Since you can make flowers from fabric that stretches well and strongly by pulling it with a rope, there is no need to cut out complex shapes - you can cut two circles from nylon.

Rose from a rope
Roses made from rope or strips of fabric are often used to decorate belts, headbands and other accessories. Such structures are secured manually using a seam over the edge or using glue.
- Fold a strip of fabric 5 cm wide in half along the longitudinal side with the wrong side facing out and stitch.
- Turn right side out (it is important that the seam does not twist).
- Using a basting stitch, gather slightly and sew to the product along the edge of the connecting seam.
- To decorate a handbag or hair decoration, the sewing edge (after forming a flower with pins) is smeared with glue and connected to the base.
A rope or thick decorative cord is immediately glued to the product during the formation of the inflorescence. For reliability, the cord is sewn to the base around the perimeter.

Knitwear decor
In most cases, to create fabric flowers, a master class requires a large number of step-by-step illustrations. You can make simple but expressive plants for decorating knitwear from any dense and fairly thick fabric that is not prone to fraying - felt or fleece.
You can make two types of flowers - double and simple with curved petals.
- For the first, you will need a long strip of fabric 4-6 cm wide, folded in half and stitched along the connecting edge (no need to turn it inside out).
- The resulting element should be rolled in a spiral and sewn to the product from the side where the layers meet (i.e., the place where the material is folded forms the front part) - you will get a rosette resembling a rose made from a rope.
- Using scissors, you need to make cuts in increments of 0.3-0.5 cm to create the petals of the inflorescence.
To make a textured flower with petals, you need to cut 6 petals from fabric (the base of the petal should be straight). Make an opposite fold on each one and assemble it into a bud using a needle and thread.
The middle of the flower can be decorated with beads or a bright button.
The leaves in such compositions are sewn to the product along the longitudinal axis.

Cosmic flowers
Inflorescences, whose silhouette is formed using folds of the material, can be used to decorate clothes, furniture covers, clutches and handbags. These elements are based on a circle and are good because they have minimal volume and practically do not lose their appearance after washing.
For production you will need:
- hard woven dublerin;
- decorative material;
- thread;
- bead or button.

When choosing dublerin, it is better to purchase the hardest one with the adhesive side.
- Using the template, you need to cut out a base circle from dublerin.
- The radius of each inflorescence is cut out 2 times larger than the base, so that the decorative material covers the doublet on both sides.
- If the decorative material is prone to shedding, then it must be cut using curly scissors with a margin of 0.5 mm for the hem.
- The doublerin is placed in the middle of the inflorescence blank from the wrong side and ironed through gauze so that the two fabrics stick together.
- The allowance is pressed to the wrong side.
- The material is gathered to the center, secured with thread and decorated with a bead or button.
You can secure such a flower to the product by stitching it along the contour.
It is important to remember that the decor will last a long time not only due to the absence of complex and multi-component elements, but also provided that the base fabric and the material used for decoration have the same characteristics and care requirements - dyeing method, temperature and washing technique.
Master classes: DIY fabric flowers.Satin ribbon flower
Master class with step-by-step photographs: How to make a flower from a satin ribbon with your own hands.
1. Take a ribbon 4 cm wide. Cut 5 pieces of ribbon 7.5 cm long and 5 pieces of ribbon 9 cm long. Lightly singe the edges.
2. Fold one piece of tape in half. We sew small stitches along the open cuts, departing 2-3 mm from the cut. The thread should be the same color as the ribbon.

3. We tighten it.

4. Without breaking the thread, sew a second piece of ribbon of the same length. In this way we collect 5 pieces of the same length for one thread. We tighten it.

5. Connect in a circle.

6. We do the same with blanks of a different size. Assemble the flower using glue or a glue gun. I used a button as the center. This flower has a very neat center and you don’t have to glue the button, but simply sew it on.

7. Cover the wrong side with a circle of felt (glued with a glue gun). The reverse side can be covered with a circle of cardboard covered with fabric. You can also cut a circle from a plastic bottle and cover it with fabric.

Using this flower you can make an elastic band, a brooch, or decorate a headband with it.

This flower is made from pieces of satin ribbon 8 cm and 9.5 cm long.

Rep ribbon flower
Cut the ribbon into pieces of equal length. Here I got pieces 7.5 cm long. We singe the sections with a lighter (match or candle) so that they do not unravel.

Fold it as shown in the photo.


Fold it so that all 4 corners are together.

Secure with a needle and thread.


Without breaking the thread, we collect the remaining petals in the same way.

Connect in a circle. And I once again pass the needle and thread in a circle to secure it more firmly.

I bring the needle to the wrong side and stitch there in a circle.

I'm sewing on a button. The middle can be decorated with sewn rhinestones, etc.

I sew an elastic band on the inside.

Satin ribbon rose
Master class with step-by-step photographs: How to make a rose from a satin ribbon with your own hands.
1. Satin ribbon 5 cm wide. This rose took 75 cm long. I singed the edges, but this is not necessary.

2. Fold the edge of the ribbon to the wrong side like this.

3. We begin to twist the corner.


4. Fix the twisted corner (the middle of the rose) with thread.

5. Bend the tape so that one edge of the tape runs along the other edge.


6. Bend along the line of contact of the edges of the tape.


7. Sew along the edge with a “forward needle” seam.


8. We bend the tape again so that one edge of the tape runs along the other edge.

9. Bend along the line of contact of the edges of the tape.

10. Sew along the edge with a “forward needle” seam.

11. And so we repeat until the end of the tape.

12. End of tape.

13. It turns out like this “spiral”.

14. Lightly tighten the seam, evenly distributing the folds.

15. The middle of the bud begins to curl on its own.

16. We begin to twist the bud, fixing each layer with thread or a glue gun.


The type of bud depends on how rigid the tape is, how tightly it was pulled and how tightly the layers are laid.
The tape I have here is quite stiff, it was pulled tight and the layers were not laid tightly.

Making leaves. I also made the leaves from ribbon 5 cm wide - there was no other suitable color.


View from the inside.


I glued the leaves with a glue gun. I covered the underside of the rose with a round piece of felt and also glued it with a glue gun. I glued it with a glue gun and a rubber band.


For a rose with a smaller diameter, 65 cm of satin ribbon was used and it was twisted more tightly. The tape itself is also softer.

Ribbon rose
In order to create such cute roses you will need very little time. They are very easy to implement and, best of all, do not require large financial outlays. It took me less than 10 rubles to make one such ring: 5 rubles for the blank for the ring and 2.5 rubles for the braid.
The roses are made from zig-zag braid (this braid is also called “snake” or “bindweed”).
For the large rose I used 50 cm of braid, for the smaller one - 46 cm.
Master class: Rose from braid
So we will need:
- snake braid
- threads in the color of the braid
- needle
- scissors
- lighter or matches
- glue gun or other suitable glue
1. Cut the braid to the required length.

2. Fold in half.

3. We intertwine (twist) the parts of the braid with each other.


4. Weaved to the end.

5. Carefully trim the ends of the braid and singe them with a lighter.

6. We begin to twist the bud and stitch it with thread on one side (the bottom of the rose or the wrong side). It is better to take the threads to match the braid - this way the work will look neater. For the master class, a contrasting thread was used for clarity.


7. Straighten the rose petals, slightly bending the outer layers.

8. The braid rose is ready.

In order to make a ring, we take a ring blank with a round platform.

Glue the ring blank to the rosette using a glue gun.


Fabric Circle Flower: Carnation
1. Cut out a template from cardboard - I have a circle with a diameter of 6.5 cm. Take a piece of synthetic fabric (the fabric should melt well over the fire). Cut out 12 circles from fabric.

2. We burn the edge of the circle over the candle in small sections and immediately, before it cools down, bend it in different directions (toward and away from ourselves). The edges of the circles are wavy.

3. Take one circle of fabric and fold it in half.

4. Then put it in half again.

5. Secure the corner with thread. We do this with all circles.

6. Cut out a circle from felt. We make leaves from fabric (I used green satin ribbon). We begin to glue the blanks with a glue gun. First, I glued two circles to determine the size of the leaves. Then I glued the leaves and continued gluing the prepared circles.

The first layer takes 4 circles. We glue the second and third layers of circles in a checkerboard pattern in relation to the previous row.

In order to glue the first layer, completely coat the felt circle with glue. In order to glue the second layer with glue, we spread an area twice as small. For the third layer, apply glue only to the middle. Then we drop a drop of glue into the middle and press the petals of the third layer against each other.

Fabric flower (sharp petals made of circles)
Master class with step-by-step photographs: How to make a flower from fabric with your own hands.
1. We cut out templates from cardboard - I have a circle with a diameter of 6.5 cm and 5.5 cm. Take a piece of easily draped fabric and cut out 5 circles of each diameter.

2. Take circles of the same diameter and fold one circle in half.

3. Then cut it in half again.

4. Sew small stitches along the open edges, departing 3 mm from the edge. The thread should be the color of the fabric.

5. Without breaking the thread, sew the second circle. The folds of all petals in one row should face the same direction.

6. We assemble 5 blanks for one thread in this way. We tighten it.

7. Connect in a circle.

8. We do the same with workpieces of a different diameter.

9. Assemble the flower using glue or a glue gun. I used a button as the center.

10. Cover the wrong side with a circle of felt (glued with a glue gun). I also glued the elastic band on using a glue gun.

This flower can also be used as a brooch by gluing the base for the brooch to the reverse side. With the help of such a flower you can decorate a headband, etc.

Another example of a flower with sharp petals made from circles of fabric:

Fabric flower (round petals made from circles)
Master class with step-by-step photographs: How to make a flower from fabric with your own hands.
1. Cut out a template from cardboard - I have a circle with a diameter of 5.5 cm. Take a piece of easily draped fabric and cut out 5 circles.

2. Fold one circle in half. We sew small stitches along the open cuts, departing from the cut 3 mm. The thread should be the color of the fabric.

3. We tighten it.

4. Without breaking the thread, sew the second circle.

5. We collect 5 blanks for one thread in this way. We tighten it.

6. Connect in a circle.

7. I used a button as the center.

8. Glue the button into the middle (I use a glue gun). Cover the inside with a circle of felt.

The reverse side can be covered with a circle of cardboard covered with fabric. You can also cut a circle from a plastic bottle and cover it with fabric. Using this flower you can make an elastic band, a brooch, or decorate a headband with it.

DIY satin ribbon rose
Take a satin ribbon 5 cm wide and cut it into squares. You can take a tape of a different width. A narrower ribbon will make smaller roses, but it’s better to try for the first time on a 5 cm ribbon.


Cut the required number of squares. I have this rose of 25 petals.

We singe the cuts over the fire so that they do not crumble. For scorching, you can use a candle, matches or lighter. I feel more comfortable with a candle, and if I also take an aromatic one, I feel complete relaxation.

Fold the square diagonally with the right side facing out.

We bend two side corners towards the central one. There is no need to seal them over a fire - I sealed them to make photographs easier to take.


Cut off the corners (approximately 5 mm).

We seal the cut over the fire. It is easier to do this by holding the cut in tweezers and leaving it sticking out about 1 mm. It is more convenient to use tweezers that are flat and even (not like the one in my photo). I touched my convenient tweezers somewhere and had to do it with what I had.

We do this with all the squares.

Take one square and twist it. Secure at the bottom with thread. You can also attach it with glue, but I prefer to sew the first petals together.

We take the next petal and wrap it around our center. We place the tips of the petals opposite each other.

Take the next petal and continue to form the bud. I apply subsequent petals so that the beginning (corner) of the next petal falls in the middle of the previous one.

We continue, trying to place the sections of the petals at the same level.

The bottom of the rose should be almost flat.

Continue to the desired size of the rose.

I make the leaves from satin ribbon 4 cm wide. Cut a piece of green satin ribbon 8 cm long.

Let's fold it like this. Once again we fold along the fold line so as to combine points A-A and B-B.

Fold it so that all the corners on the front side are aligned.

We cut the corner.

We seal the cut over the fire, holding it in tweezers.

View of the leaf from the reverse side.

Front view of the leaf.

Assembling the rose: glue the leaves to the back with glue (I use a glue gun). Carefully decorate the wrong side. There are many different ways - I prefer to cover the back with a circle of felt. Then I use a glue gun to glue the rubber band on.

Flower made from bindweed braid (snake, zig-zag)
Master class: Flower made from bindweed braid (snake, zig-zag)


Materials: satin ruffle braid 2.5 cm wide, a piece of felt, a button.
Tools:
I have a ruffle braid made of satin fabric, folded 2 times. I cut 33-35 cm, seal the edges over a candle.

I wrap the braid around my finger, stitching each layer with thread.

View from the inside.

I'm straightening it out. The result is a flower like this. You can leave it like that, or you can decorate the middle with a button or bead.

In order to cover the wrong side, I cut out a circle of felt and glue it with a glue gun. First, I apply glue to the middle of the flower and glue it - the edges of the felt remain unglued. Then I apply glue to the edges of the felt and press the flower against them.

View from the inside. You can glue an elastic band or a base under the brooch. You can use this flower to decorate the headband.


Master class: do-it-yourself ruffle braid flower
Materials: satin ruffle braid 2.5 cm wide, a piece of felt.
Tools: sharp scissors, matches (candle or lighter), tweezers, needle, glue gun (you can use other types of glue).
I have a ruffle braid made of satin fabric, folded 2 times. I cut off 50 cm and seal the edges over a candle.

I twist it around the handle and stitch each layer with thread.

View from the inside.

I cut out a circle from felt and glue it with a glue gun. I start by applying glue to the middle of the flower and gluing it - the edges of the felt remain unglued. Then I apply glue to the edges of the felt and press the flower against them.

You can make leaves from braid and decorate the flower. You can glue an elastic band or a base under the brooch.
Photo: Carnation flower made from ruffle braid


