Sew a women's tablet bag. How to sew a fabric bag with your own hands without a pattern. Burlap patterns
Today you can find any thing on the market; the variety of goods is so great that it’s simply dizzying. But the problem is that as soon as some new fashion trend begins, the market is filled with the same type and monotonous product, and in the end, what is fashionable is worn by 85% of 100.
You want to stand out from this gray fashion mass, and for this you will need some skills, desire and imagination. So today let's talk about how sew a fabric bag independently and be exclusive and unique.
DIY fabric bag
It is worth noting that a woman’s life cannot proceed fully if she does not have bags. This is an essential accessory for every female, and even little girls cannot imagine their walk without their favorite handbag.
This could be a huge shoulder bag, a small ladies' clutch, or a medium-sized bag with long handles. There can be many options, it all depends on your preferences.
In order to sew a bag without outside help, you do not have to be a professional seamstress. To do this, you will need the ability to use a sewing machine or tighten a thread into a needle, everything else will depend only on your efforts and desire to create something new, beautiful and extraordinary.
It should be noted that even the lack of imagination will not be a hindrance in this matter, because on the Internet you can find a lot of different interesting options that can be brought to life. It turns out that, in principle, we have everything at hand; now we will need to find out what material is best to sew a bag from and how to do it.
Fabric for bags and backpacks
Today there is a huge variety of products on the fabric market. It is very difficult for the ignorant and beginners to understand such diversity. To make the process of choosing material for sewing a bag easier, let's figure out which fabric is suitable for which bags:
- Polyester. This material makes excellent and very durable bags.
- Bags made of nylon are quite lightweight, but at the same time they are highly durable. Among other things, they are quite elastic, and the material is often used specifically for factory tailoring of bags.

- Faux leather is a very common material in the bag sewing industry. Here I would immediately like to note that the quality characteristics of such material are not at the highest level. Usually, so-called consumer goods are made from it. Such bags are inexpensive, but they are also not practical to use, or rather, even to say, they are short-lived.
- Artificial suede is similar to its natural counterpart. The material is quite practical and wear-resistant, so bags made from this fabric are excellent both in terms of quality characteristics and appearance.
- Jacquard. The fabric is not cheap, the surface of the fabric is not smooth. Used for sewing children's backpacks and bags.
- Cotton. This fabric contains 90% cellulose. Often used for sewing a variety of bags.

If you have some fabric at home, then you don’t have to buy another one from the store. Almost any material that is not too thin can be suitable for a bag.
Fabric shoulder bags
One of the most practical bags is the shoulder bag, as they say, put it on and forget it. It's beautiful, comfortable and practical, the perfect combination of characteristics for a bag. In order to sew such a bag you will need a lot of time, but believe me, the result will be worth it.
First, let's look at the material and tools that will be useful to us in the process of sewing the type of bag in question:
- any material that is suitable for lining
- fabric for a bag (pieces measuring 34 x 35; 34 x 27 and a couple of pieces 27 x13 cm)
- lace (length no less than 40 cm)
- doublerin
- pair of carabiners and half rings
- button (the best option is magnetic)

- bag strap
- tools (scissors, ruler, pencil, thread, bobby pins)
If everything listed above is at your fingertips, then go to battle. Step-by-step instructions for sewing a “messenger bag”:
- If you want the bag you sew to keep its shape, then sewing begins by gluing the front fabric with dublerin. The sizing process must be carried out through gauze.
- We fold the prepared couple of large pieces of fabric right sides together and sew them together. Don't forget to always leave a seam allowance, one and a half centimeters will be enough.
- The seam will need to be ironed, and the lace will need to be attached to the front of the fabric, and then stitched.

- Place the pieces of fabric right sides together and sew the side seams.
- Now we need to start shaping the bottom. We fold the existing corners, do not forget to secure everything with bobby pins. We measure 5-7 cm from the sharp edge, draw a line with a pencil and stitch it. Excess fabric can be cut off to the seam, leaving only one centimeter in reserve.
- We turn the fabric inside out, in this case it will be necessary to iron the side seams so that it is clear how to further work with the resulting workpiece.

- Let's move on to sewing the flap for the bag, which is a must on such a model. To do this, take 2 small prepared pieces of fabric and fold them, again with the right sides facing each other. Draw the shape of a pocket, rounding the corners.
- We sew according to the drawing, leaving the largest edge unstitched.
- Carefully trim off the excess fabric. Find the middle on the valve and mark it with a bold dot. This is where we will attach the magnetic button.
- From the fat point in the middle of the valve, measure half a centimeter in both directions and cut the material. We insert the button (the magnet itself will be attached in a different place). Turn the fabric inside out.

- Let's start connecting the bag and the valve we made. We pin the valve to the bag with bobby pins and attach it. Do not forget to iron the fabric after each process.
- We bend the flap onto the front side of the bag and mark on its base the place where we will attach the magnet.
- To the side seams at the top, you will need to sew leather flats with half rings sewn into them. This is a mount for our future belt.
- Don't forget about the lining and the need to cut it out. For this we need two pieces of fabric measuring 30 x 34 cm.
- They need to be stitched around the perimeter so that the seam is open. Don't forget to cut corners. After we turn the material inside out, we sew the seam that we previously left unsewn.
- We connect the lining to the bag with pins and stitch. The bag is ready, all that remains is to turn it inside out.

The “messenger bag” is ready for use. Although there is a lot of hassle, you will be pleased with the result.
DIY bag patterns made from fabric
For those who are not new to sewing, it will be enough to have a pattern on hand in order to sew an original bag. We present to your attention detailed patterns of some bag models:
- Denim bags never go out of fashion, and today this rule also applies. Therefore, if you have old jeans lying around somewhere that you would hate to throw away, but you will never wear them again, then this is an excellent fabric option for a denim bag.

- Men's fabric bag can also be original. If you put your hand into making it. Sewing a small bag for your man is not so difficult if you have a detailed pattern with all the necessary dimensions.

- Fabric shopping bags sewing is even easier. In this case, having a pattern is half the success. The fabric for such bags can be any, at the discretion of the creator.

If you are new to sewing, then we suggest watching a video that will explain and show you in detail. how to sew a fabric bag with your own hands. Don’t be afraid to experiment, and then you will be able to achieve a lot, especially when you have a clear example before your eyes.
Video: Fabric bag - master class
A stylish and original image, which is carefully created by every fashionista, is emphasized by the chosen wardrobe; its unique highlight is the unusual and exclusive accessories. Functional little things that no person can do without include bags and purses of various types, design styles and sizes, with an impressive and aesthetic design and practical use.
A bag, sewn and made with your own hands, can be on par in quality and appearance with many designer models from popular brands and world-famous brands that are on everyone’s lips.

After reviewing the photos of handmade handbags presented in the article, you can choose the model you like and make it yourself, using available materials and special tools.

Choosing a bag style and required materials
Modern, changing fashion is constantly changing and dictates the rules for selecting accessories for a wardrobe that corresponds to a certain style chosen by a person as the basis of his own image.

There is a certain classification of handbags, focusing on it, you can simplify the choice of model for further independent tailoring, with the choice of material and additional and high-quality accessories:

Spacious beach bag. Great for summer holidays, going to the beach, family picnic or other fun beach themed event.


Small evening bag. Used for visiting a variety of special occasions, going to the theater or cinema, exhibitions or corporate events and cafes.

Children's accessory with handles. Such bags are small in size and can have bright colors or original prints with recognizable fairy tale and cartoon characters.

Casual crossbody bags. They go perfectly with urban or casual clothing styles, are practical and reliable, and are made from wear-resistant and high-quality materials.

Stylish laptop bags. Used for carrying personal laptops, they have an original cut with a durable strap and a compartment for a charger.

To sew a bag of any kind yourself, you need to select a material, and you can use the fabric of old jeans, jackets and jackets with an interesting pattern, or purchase a new piece.

Separately, you will need threads with needles and additional accessories, such as various fasteners, all kinds of rivets or zippers, which can be purchased at sewing or specialized stores.

Materials for sewing an exclusive bag
Having chosen a pattern that matches the model of the future bag, you need to decide on the materials necessary for sewing a practical and attractive accessory with your own hands.

Before sewing a bag, you must choose a material, the use of which may require a special approach, purchase it in the required quantity or prepare it for further use:

Genuine leather, suede or their substitutes. When using used materials, you should carefully inspect them for abrasions and damage, eliminating all defects.

Thick cotton or soft denim. You should not choose a fabric that is too rough and thick for sewing, which cannot be processed when sewing with a sewing machine or by hand.


Durable wool, rough linen or beautiful felt. High-quality fabrics can be purchased as a new cut or a bag can be cut according to a selected pattern from various items of clothing that have gone out of fashion.

To sew an original handbag with a unique design, you need to carefully consider its design, select all the decorations and functional accessories, and you can draw up a preliminary project.

By following all the stages of work, you will be able to create a skillful masterpiece without having special or special sewing skills or working with leather, fabric and other materials, fittings and accessories.

Step-by-step activities for sewing a bag with your own hands
All procedures for such needlework can be divided into preparatory, main and final stages of work, each of them requires a responsible and attentive approach, and special care in implementation.

The standard stages of self-tailoring any bag include the following procedures, which are interconnected and must be carried out in strict sequence:

Selecting a model and pattern. The model is selected based on your own preferences; the pattern must be detailed, informative and contain all the necessary dimensions of the individual, functional elements of the bag.

Preparation of materials. If you plan to use used materials, old items must be washed and ironed to simplify cutting procedures; when using purchased cuts, they must be purchased in advance at the store.

Purchase of accessories. To make a functional accessory, you will definitely need fasteners in the form of snap or magnetic buttons, zippers of different lengths to decorate the internal and external pockets of the bag.

Cut the bag according to the pattern. It is carried out using pre-prepared patterns of individual elements of the finished product and a lead pencil, the trace of which must be washed off after sewing, and sewing scissors for cutting.

Sewing individual parts. To simplify the stitching procedure, you can first baste the individual elements, and then use a sewing machine or manually stitch them, observing a strict sequence.

Reliable fastening of accessories. It is produced according to the recommendations of the craftsmen, buttons and fasteners are fastened firmly and securely or glued to the fabric with a glue gun, zippers are sewn on manually or by machine.

Decorating and finishing the bag. The decor may differ from the design of the model and is the embodiment of our own solutions, which allow us to decorate the bag with unusual installations of beads, fabric flowers and bows, and special accessories.


Upon completion of all stages of work, the hand-made bag will be ready for functional use; before wearing, it is recommended to wash it by hand or machine.

An exclusive accessory will become a real decoration of your wardrobe and will allow you to create unusual ensembles with outerwear or other accessories, feeling confident in yourself and your own stylish appearance.

DIY bag photo


Bags are an indispensable accessory in our daily life. We go with them to work, to the store, on dates, to various meetings, simple walks, important events, and so on. Today you can find a bag not only in women's wardrobes, but also in children's and even men's wardrobes.
We invite you to familiarize yourself with several master classes that describe sewing bags in detail. Patterns are included with each of the proposed types of bags. And these are simple fabric, denim, household, travel, men's and clutches.
How to make fabric bag patterns with your own hands
The easiest way is to find a ready-made pattern on the Internet or in a magazine. Then, if necessary, you can simply increase or decrease its size and begin cutting and sewing the selected type of bag.
The second option is to draw patterns for a fabric bag with your own hands. To do this, you will need to sketch out a model of the future bag and imagine what elements it will consist of. For example, it can only have a front and back wall, bottom, sides, the handle can be sewn separately or be one piece with the main part, and so on.
Small cloth bag
Such a small fabric handbag is very relevant at any time of the year. It is great for walking with friends and for everyday wear, because it will fit the necessary cosmetics, phone and notepad.
Master class on sewing a small fabric handbag:
- Cut out the paper parts of the fabric bag pattern with your own hands.
- Transfer the pattern to the reverse side of the fabric, cut out the required number of parts.
- Sew the two sides together (front and back), the sides and the bottom together.
- Sew the sides together.
- Sew the bottom completely to the walls.
- Place the lining over the fabric frame.
- Sew the lining and frame together, leaving a small opening so you can turn the bag inside out.
- Sew the hole closed with a blind stitch.
- Sew the lid of the bag.
- Make a strap and sew it to the bag.
A small fabric bag is ready!
Clutch bag
This clutch is very convenient because its size is adjustable with buttons. When closed it is small in size, but when unzipped it becomes a spacious bag.
Master class on creating a clutch:
- Transfer the details of the fabric bag pattern with your own hands onto the prepared material.
- Cut out the required number of parts.
- Make a bag out of them.
- Make the lining in the same way.
- Place the lining and bag together.
- Turn the bag right side out.
- Glue two pairs of magnets or buttons.
- Sew on the snake.
The clutch bag is ready!
Denim bag
Master Class:

- First of all, you will need a denim bag pattern, which is located above. Print it out and cut out the pieces.
- Now the denim bag pattern is transferred directly to the fabric.
- Cut out all the pieces.
- Sew the pattern pieces together as shown in the picture above.
- Make and sew the lining.
- Turn the bag inside out, fasten the handles and decorate it with a bow.
All is ready!
Man's bags
It has long been no secret that men also need a bag. How many keys, wallets, handkerchiefs, mobile phones and other small items can you put in your pockets? After all, it is much more convenient to put all this in one small bag, especially since today there are many different styles specifically for men. We suggest you sew one yourself.
Step-by-step instructions for sewing a men's bag:

- First of all, you will need a pattern for a man's bag. An example of this is above. Just take it and print it out, then cut out the individual elements.
- Take fabric for the bag. It is better to opt for a thick one (for example, waterproof, nylon, leather, and so on).
- Take fabric for the lining (it is better to choose cotton) and dublerin (this is a special fabric for connecting the lining and the main fabric).
- Transfer the pattern to the fabric and lining. Cut out all the pieces.
- Glue the dublerin using an iron where it may be needed.
- Make a belt. Take its parts, fold the right side in half inward and sew the parts together. Unscrew the belt.
- Sew the lining to the main parts of the bag.
- Sew on the snake.
- Sew on the bag lid and pockets.
- Collect all the parts and stitch them together.

The man's bag is ready!
Summer bags
Summer bags are also called beach bags. As a rule, this is a fairly lightweight design with one large zip compartment. They can be sewn from different fabrics or knitted or crocheted. A pattern for the latter type of summer bag is not required. In this case, you simply take and knit a large piece, which is then sewn together.
Step-by-step master class on sewing a summer bag from fabric:

- First you will need a summer bag pattern. For example, you can use the one above. This bag consists of two front walls and sides, a bottom, handles and an inner pocket.
- Cut out the paper pattern pieces.
- Place the pattern on the back of the fabric and transfer the pattern.
- Cut out all the details from the fabric, stepping back from the edge a couple of centimeters.
- Cut out the lining.
- Sew two pockets in the center of the two linings. Don't forget to fold the edges.
- Place the lining and front wall, lining and side wall together. Put it all together.
- Assemble the second wall and side in the same way.
- Sew together two pairs of walls and sides.
- Sew the bottom to all the walls.
- Make handles. To do this, fold each ribbon in half lengthwise with the right side inward and stitch the edges. After this, unscrew the handles.
- Sew the handles to the bag. Fold the edges of the lining and walls inward. Attach the straps to the bag and tuck their edges. Sew everything together in two rows for greater security.

Summer beach bag is ready! It is suitable for both going to the beach and walking around the city with friends.
Travel bag
Travel bags should be comfortable and roomy. And although there is a wide variety of them, it is difficult to find the most suitable one. If you want to sew such a bag yourself, then read the instructions below.
Instructions on how to sew a travel bag:

- The pattern for a travel bag is not much different from the pattern for a summer bag. The main distinguishing feature is that it is necessary to increase the size of all walls and bottom by at least one and a half to two times.
- Transfer the pattern onto the fabric. For travel bags, it is better to choose the following types of fabric: polyester (900d, 1200d, 1800d or 2400d), nylon.
- Cut out all the pieces of the bag and lining.
- Repeat steps 6-11 from the previous master class. If desired, you can make several internal and side pockets.
- Sew a zipper to the top of the bag.
- Sew on the handles. Additionally, you can sew on another long handle.

The travel bag is ready!
Shopping Bag
A shopping bag is something between a summer bag and a travel bag. It usually consists of one large compartment and is made of durable material (for example, nylon or cotton).
Detailed instructions for sewing a shopping bag:

- The shopping bag pattern is the outlined outline of a simple bag with handles, often called a “T-shirt.” An example of such a pattern is above.
- Cut out the pattern from paper.
- Attach the paper pattern to the back of the fabric, which you previously folded in half. The fold should be at the bottom, where you plan to make the bottom of the bag.
- Cut out the details of the bag, stepping back from the edges of the pattern a couple of centimeters. Don't cut the bottom.
- Sew the fabric together, leaving holes in the places for folding and handles, that is, at the top of the bag.
- Sew the handles together.
- Fold the fabric where you don't want the bag to be sewn and finish the edge. Either carefully baste or adhere using hemming tape.
- Turn the bag inside out.

The shopping bag is ready!
Such a necessary thing as a fabric bag is suitable for daily shopping; in the summer you can take it to the beach under towels and blankets. It is not so voluminous, but nevertheless quite roomy. If you still don’t have a canvas bag at home, be sure to sew one for yourself; it will always find use in the household. In addition, it is sewn easily and quickly, even a novice seamstress can handle it, if you have a desire to create and a sewing machine, let's sew together.
In order to sew a fabric bag with my own hands I needed:
- raincoat fabric 1 m. You can take any dense fabric - teak pillowcase, gabardine, cotton, calico.
- threads in color
- glue web 10 cm.
- detachable zipper 45 cm.
- haberdashery cardboard 36*12 cm.
- single-horn foot for sewing on a zipper
- tailor's tools: scissors, pins, measuring tape, chalk, ruler, sewing needle
MK sew a fabric bag with your own hands without a pattern step by step
1. I draw the details of the bag on the fabric. I cut out two rectangles with sides 49*42 cm. In the corners I cut out squares with dimensions as shown in the photo. Don't pay attention to the seams on my patterns, I just didn't have enough fabric, I had to add it)

2. I overlock the upper edges of the parts using an overlocker, using a zigzag stitch.

3. I unfasten it all the way and secure it with pins with the right sides facing inward, as in the photo.

4. I install a single-horn foot on the sewing machine for sewing on a zipper lock. I'm laying a line.

5. On the front side I make a finishing stitch along the zipper lock.

6. I fasten the lock all the way.

7. I cut off the excess and make notches in the corners.

8. I fold the edges of the fabric inward and secure with pins

9. I sew a line on a sewing machine. Then I do steps 6, 7, 8 from the other end of the zipper.

10. I cut out two fasteners for the lock from a piece of fabric - rectangles with sides 8*5 cm. They are needed in order to prevent the zipper from coming apart.

11. I bend the edges of the rectangles inward by 1 cm on both sides.

12. I hand-baste the zipper onto the lock at both ends.

13. I sew fasteners onto the lock on both sides. Now the zipper is securely fastened and will not come apart!

14. I fasten two layers of fabric together at the top of the bag, at a distance of 3.5 cm from the edge. I fix it with pins. I sew a line on a sewing machine.

15. I apply it to the front part of the bag in the middle and secure it with pins.

16. I start processing the bottom of the bag. I secure the bottom cut with pins. I sew a line on a sewing machine, retreating from the edge by the width of the foot. I sew it on an overlocker, using a zigzag stitch.

17. I turn the bag right side out. I place a finishing stitch along the top of the bottom seam, sewing the allowance onto the fabric. I smooth it with an iron and steam.


18. The next stage is processing the side sections of the bag. I fasten the parts together with pins and sew a stitch on the machine, retreating from the edge by the width of the presser foot. I overcast the edges with an overlocker, using a zigzag stitch.

19. Now I’m sewing the bottom of the bag.

20. In order for the bag to be stable at the bottom, have a shape and not fall through, I will sew a solid bottom. I cut out a rectangle with sides 36*12 from haberdashery cardboard, which I then place in a fabric case.
Instead of haberdashery cardboard, you can use isolon or energyflex, which is sold in construction stores.

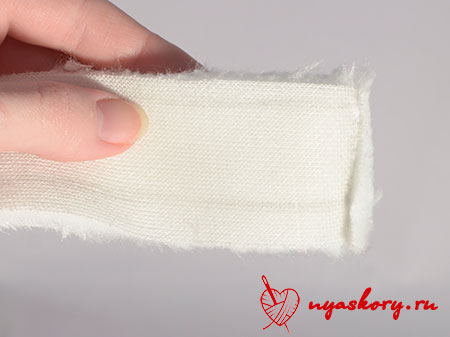
21. I sew the cover around the perimeter, leaving one edge unsewn. I cut the corners as in the photo.

22. I place the cardboard in the case and sew up the free end by hand.

23. I place the hard bottom on the bottom of the bag and attach it to the bottom seam in the middle with a few stitches to secure it.

24. I start sewing the straps. I cut out a rectangle 82*4 cm. I fold the edges inward and baste it by hand.

25. Using a sewing machine, I lay a stitch along the edge of the straps. I remove the hand running stitches and iron with steam. I cut it in half to get two straps.

Greetings to everyone gathered now on the blog! Today I will tell you how to decorate your life and the lives of those around you with the help of such a simple item as a handmade bag.
There are a lot of bags, handbags, clutches, etc., etc. sold in stores. But it’s so great to do something like this yourself, to experience the process of creating a product, right? Many will agree with me, I think. Therefore, today we will make a bunch of handbags, cute and funny)
How to sew a bag with your own hands
First of all, I suggest you sew a cute fluffy handbag that you can give to a little girl or girl.
List of materials:
- faux fur (for the outer part of the bag);
- fleece (for lining and for covering buttons);
- threads in the color of the fabric;
- two round buttons;
- two small white rhinestones or half beads;
- padding polyester;
- paper for patterns;
- needle;
- second glue;
- pencil;
- pins (for pinning patterns);
- scissors.
You can download patterns for the future bag here: eyelet And the basis. Let's deal with them.
What kind of patterns are there:
- one-piece bag pattern (lid + back) - the entire pattern area;
- the front of the bag is everything below the side insert;
- width of the side insert - we will sew the side part into the bag, this is its width. The length is the length of the outline of the front (excluding the straight top).
As for the side insert: it should consist of two equal parts, the direction of the pile of which will be directed against each other. But this is only for fur! From fleece, simply cut one strip of the required width; you can ignore the direction of the pile.
How to sew a bag: a detailed master class
First of all, we will work on the side of our product.
Take two pieces of fur side and sew them together along the edge. Sew them so that the pile of the pieces is directed towards each other.
Why do I suggest doing this? I answer: fur has a long pile, which should go in one direction. And this can be achieved just by sewing two pieces together
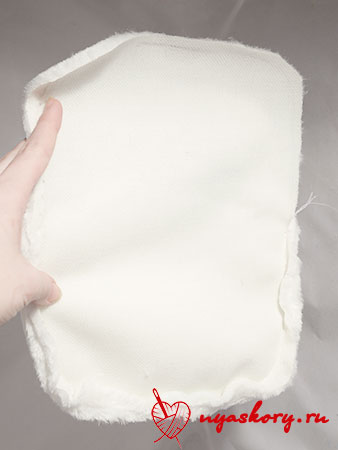
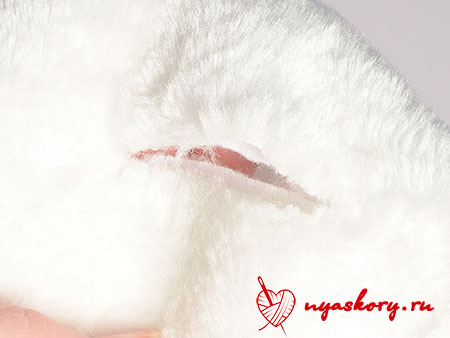
Trim off any excess. And sew the side part to the front of our future bag.


Now let’s sew on the back of the bag! The lid is already in sight

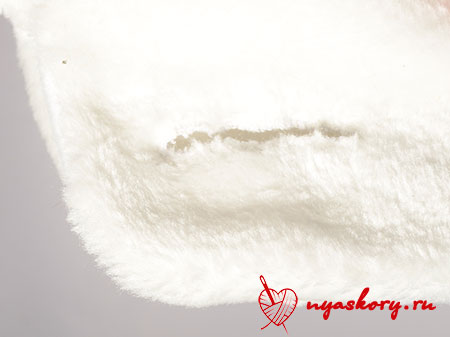
Trim the edges of the seam allowance. See why:
By the way, here's the back view of the bag:
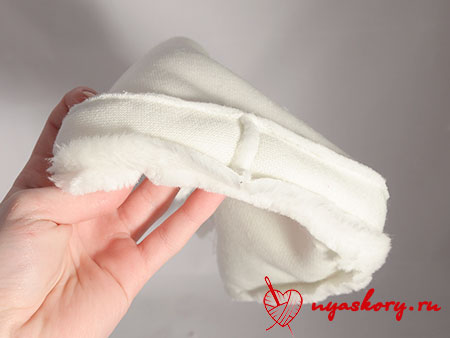
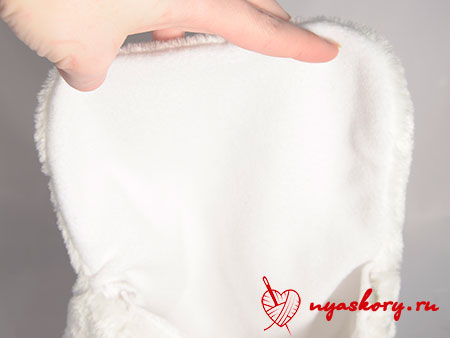
Sew a fleece “handbag” in exactly the same way. This will be the lining - the inside of the bag.
How to sew a lining to a bag? To begin, place the fleece and fur parts with the right sides facing inward.

This photo seems to make it clearer

And just sew the covers of both parts together.

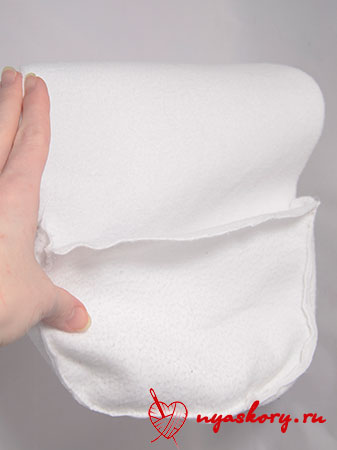
Screw the inside into the bag.

Sew the remaining edges with a blind stitch.

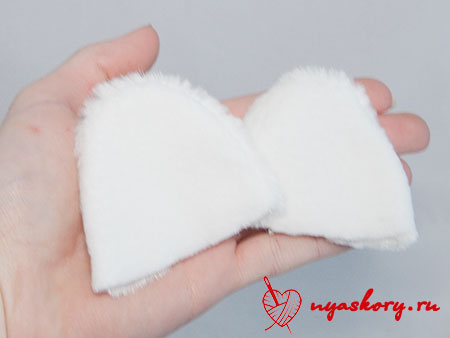
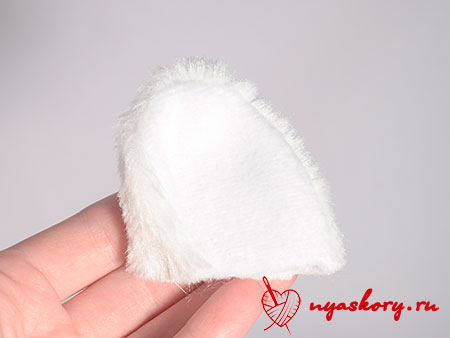
To decorate our bag, I suggest you cut out these ears:

This is how you should get them:
Now let's make a strap for the bag. To do this, cut three strips of fur of such length that it will be convenient for you to then put the strap on your shoulder. Weave them into a braid (tie at the end and at the beginning so that it does not come apart).

Remember we left holes for fasteners? Now you need to insert the resulting braid into them and carefully sew it up with a hidden seam.


But our bag doesn’t have fastenings yet! There are several options: you can sew in a zipper (which is better to do earlier), you can use Velcro and buttons.
I decided to go with the last option.
Cut two black circles larger in diameter than the button from black fleece and take the button.

Place a little padding polyester on the button.

And into a fleece circle, along the edge of which run a running stitch without securing:
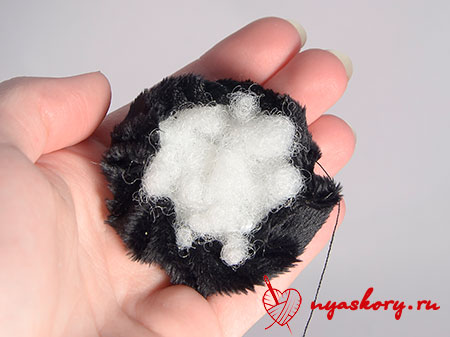
Put them together.

And pull the thread.

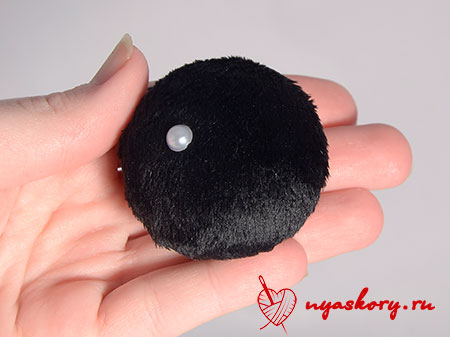
The button to secure the bag at the back should look something like this:

Glue a small rhinestone highlight on the front.
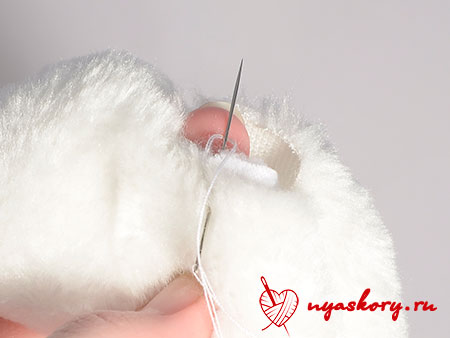
Now place the clasp on the lid of the bag to see where you will need to cut the loop.

Draw a line down the center of where you want the button to be. Make a cut along the drawn line.
To make the cut beautiful and neat, sew it with a buttonhole stitch so that each stitch fits as closely as possible to the previous one.
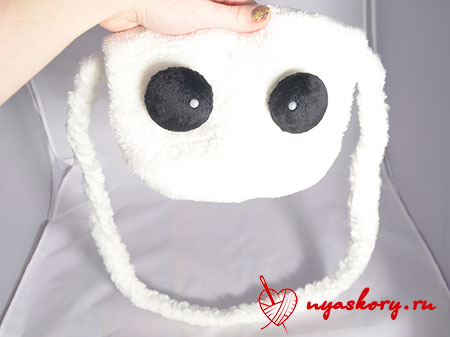
This is what the bag will look like after finishing:
Sew button eyes to the bag:
Well, now let's get back to the ears! Fold and hem their edges.
And sew them where you would like them to be.

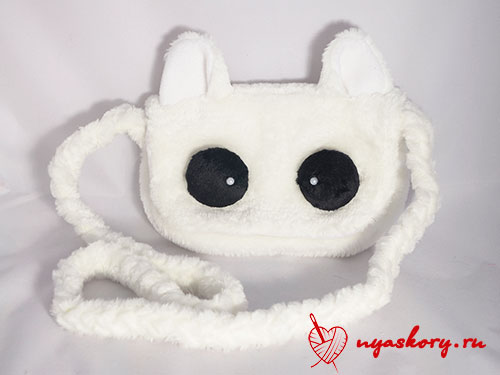
Ta-dam! The bag is ready. It turned out to be a cute kitty)
DIY leather bags
Leather is one of the most interesting and durable materials for sewing bags. Therefore, I present to your attention several master classes using this material.
Bag - cat
For this simple but very cute model (somewhat reminiscent of the previous one), you will need leatherette, scissors, an awl, thread and a thick needle.
This can be worn by both a young girl and a small child.

The simplest leather bag
No, you definitely need to get one. You will need leather, scissors, a strap, tape, a marker and (optional) a special tool for cutting several holes in a row (you can get by with an awl). All you really need to do is cut out a circle, make holes, pull the ribbon through them and attach a strap. All)

Envelope
Reminds me of the processing method of a cat bag.

Chanterelle
A lovely model)) Prepare leather or thick leatherette, braid and rivets for it. You don’t have to sew the chanterelle, just glue it along the edges and hide these places under the braid.

DIY jeans bags
However, the following models can be made from both jeans and old jeans.
Network
For this, cut the jeans into strips and weave the fabric, as in the photo. Sew it together in a bag (folding a piece of fabric in half) and sew on the handles.

Simple Denim Bag
If you have a denim leg, go ahead and make a bag! You will also need a buckle, a leather strap, scissors and thread with a needle.

Elegant handbag made of jeans
Here you will need two trouser legs, scissors, thread with a needle and a zipper.

DIY fabric bags
Rectangular
For it, take several pieces of cotton fabric, a zipper and accessories.

Clutch
An interesting idea is to use thick pieces of processed cardboard for the lining. I would recommend using plastic boards from Fix Price or juice packaging as a thick base.
Present such a handbag to your mother - she will definitely be happy))

Clutch in a semicircle
Cut two round pieces of cotton fabric and a circle of padding polyester from the fabric. Fold them into a “sandwich” and sew several times at right angles. Sew around the edge with bias tape. Fold the piece in half and sew a zipper into the bag. Decorate.

Handbag
This is where cotton fabric, lining, fasteners and floral decorations come in handy. A young lady, say 17 years old, will definitely appreciate such a gift.

Sportswear bag
For it, prepare thick fabric, braid, scissors, pins, fasteners, zipper and thread. In addition to sportswear, you can also put camping things in this bag.

Mini handbag
Using the scheme described below, you can make both a very miniature accessory and a larger item.

Remaking old things
For the first of two photo workshops you will need a long soft cloth bag, and for the second - an old T-shirt.


Photos of handmade bags
I want to show you how using the same patterns you can get many bright and unusual products.
Sandwich bag
Cute handbag made of fleece. It's quite simple! And this design can easily be implemented into a cat bag.

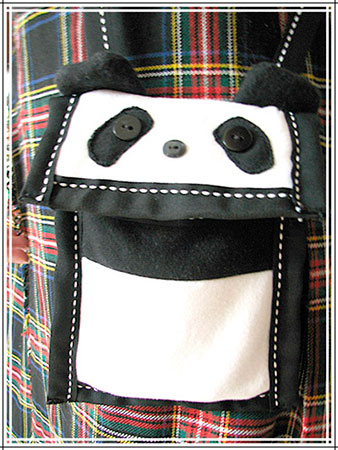
Panda bag
Cute panda design
Simple and elegant bag
The handbag is quite simple and is made according to similar patterns from the very first one.

Knitted bag
Although this bag is knitted, its design can easily be implemented in fabric.

Leather bag

Octopus bag
The bag, again, is knitted. But it is very similar to the first one (at the beginning of the article). You just need to add tentacles to it and remove the ears.

By the way, I bought fleece for the eyes of the “cat” bag Here. You're unlikely to see one like this in a store.
This concludes the article. I hope you enjoyed looking at all the bags and took something interesting for yourself. See you soon!
P.S. Subscribe to updates!
Sincerely, Anastasia Skoracheva


