How to make Smeshariki from various materials? Crafts Smeshariki from CDs: Nyusha, Barash, Losyash Do-it-yourself Smeshariki bookmarks from cardboard
On sale today you can see many new products for children's creativity; all kinds of kits are offered for creating interesting crafts. But such pleasure is not cheap. Sometimes parents look for more sustainable ways to have fun. You can spend leisure time with your children almost free of charge if you show a little imagination. Any waste material that can be recycled is suitable for creating crafts. One such example is the old ones. They are sure to be found in every home where there is a computer. Today, these storage media are becoming obsolete, but there is no point in throwing them away.
While going through old things in a table or cabinet, mom and dad throw out everything unnecessary. But they turn damaged CDs in their hands and put them back, hoping that these products will someday be useful again. If a child has an interest in creating all kinds of crafts with his own hands, then it is time to use the mirror surface of these outdated storage media for creativity.
Craft Smesharik Nyusha from CD and colored paper:
By adding colored paper to the disc, you can create any character from the cartoon “Smeshariki”. Beauty Nyusha is a lively little animal who loves romance novels and outdoor games. The color pink and daisies will help to reproduce this heroine.
1. Red, pink or purple paper is suitable for work. If whole leaves are not available, then it is quite possible to use pieces, since all the parts will be small, and the base will be a disk.
 2. Cut out all the elements for Nyusha’s face: eyes, nose and mouth.
 3. Glue the black dots onto the white circles, then attach the pink half moons. These will be Nyusha’s eyes, to the corners of which fluffy pink eyelashes should be added. Glue the nose-piglet to the central point of the disk, and place the thin mouth obliquely.
 4. Cut out two small red ears and glue on the head. Decorate the top of your head with a wreath of daisies, because Nyusha loves flowers.
 5. All that remains is to make the upper and lower hooves and attach them with glue in any order. Nyusha's craft from a CD is ready.
DIY Smesharik Barash craft from CD and paper:
To create Barash you will need a lot of round parts and a little patience. Using sharp scissors, you need to cut out the required number of small spirals. They can fill the entire surface of the disk or just process the edge. It all depends on the availability of free time and the perseverance of the child.
 1. Prepare the disk for use.
 2. Draw lots of circles on the back of the purple paper. To create even parts, use a compass or some kind of lid. Cut out circles and try them on to see if they are enough to fill the entire perimeter. Create a spiral from each circle by cutting it out with scissors.
 3. Having prepared all the spirals, stick them on the mirror side of the disk. This is not difficult to do, just coat the edge of the disk with glue, and then apply a spiral and press it with your finger.
 4. While the glue is drying, cut out the remaining parts to create the Barash. These will be the horns. The most rational way is to draw one curved horn on a sheet of blue paper, then bend it in half and cut out two elements at once, which will be a mirror image of each other. You will also need white and black circles for the eyes, a wide nose and a small red mouth.
 5. Glue all the resulting blanks onto the disk to get Barash’s face.
 6. All that remains is to attach the arms and legs. Cut them out of purple paper and the hooves from blue paper. Smesharik Barash from the CD is ready.
Craft Smesharik Losyash. DIY from a CD:
Smeshariki from a disk is one of the ways to use these mirror products for crafts. Funny cartoon characters have their own distinctive features, so they can be easily copied, you just need some colored paper. Elk has large horns, hooves and a wide nose. This must be taken into account when creating crafts from disk and paper.
 1. It is advisable to use yellow and brown paper for the product to make the Losyash more realistic. You cannot do this work without glue, scissors and a simple pencil.
 2. Cut out two round pieces to make eyes, glue on orange eyelids and attach black dots for pupils. From brown paper, cut out a wide nose, shaped like a drop.
 3. Glue the resulting elements onto the disk, covering its central part.
 4. Cut out antlers from brown paper. The moose must have branched antlers. Draw a beautiful sketch on the back of the paper, then bend the sheet and cut out two parts of the same shape at once. Cut out small ears from orange paper.
 5. Glue the horns and ears to the disk.
 6. A small mouth glued at an angle and eyebrows will help add a little character to the image.
 7. Cut out the upper and lower limbs from orange or brown paper and give them the shape of hooves.
 8. Glue the Moose to the body.
DIY Smeshariki crafts will decorate a child’s room and give good emotions to the child.
In a similar way, you can make all the Smeshariki from a CD and colored paper. Such a unique collection of Smeshariki will become the pride of a child.
Who are Smeshariki and what they mean in the lives of little fellow citizens, we think there is no need to explain. Yes, indeed, these are long-loved and still relevant heroes for our kids, and if this is so, then we need to take advantage of it. You ask how!? It’s not enough for our children to sit at the computer or TV playing games and watching cartoons; they also need to acquire more life skills: working with materials, abstract thinking, and the ability to work with their hands. All this can be realized if you glue together several figures from animated films - Smeshariki.
So, we will talk about smeshariki, or rather how to glue them from paper, in our article.
Unfortunately, our review does not cover master classes on all the cartoon characters, but we think that if you get a little creative, use paint or Photoshop, this can be fixed...
Nyusha. Many people sigh for her, and she for the prince.

Krosh. The most exciting and restless hero. It is he who adds energy and enthusiasm to the cartoon

Losyash. Local intellectual. He knows a lot, but this is not always applicable in a parking lot.

Pin. Mechanic from God. This is someone who can make everything out of nothing.

There is no need to talk in detail about the process of making paper figures. Everything is clear here. Initially, you need to print the hero on paper, preferably on a color printer. Next, we cut out adjacent elements along the contours with scissors and glue.
Today we will tell you how you can make Smeshariki from paper in several versions. The first method will be devoted to making a hero out of paper with the possibility of involving even the smallest children in the process, and the other will be for older children, because it will be a little more difficult.
Collecting all Smeshariki from paper: method 1
To make Smesharik in the simplest way, you need the following materials:- Thick pages from newspapers or magazines
- Colored paper and colored cardboard
- Scissors
- Felt pens or gouache
Step-by-step instruction:
- We crumple thick sheets of paper (pages from newspapers or magazines) into a ball (as tightly as possible so that the craft does not break).
- We carefully wrap the resulting ball with a regular square sheet of colored paper (the color must match the color of the character that your child wants to make). Or you can simply decorate this ball with gouache.
- Next, from thick sheets of paper, but of a smaller size, we make four more small lumps in a similar way - these will be the paws of our Smesharik.
- We carefully glue the resulting four small lumps (legs) to the main large ball - the body.
- From colored cardboard we cut out the remaining necessary details (ears, horns, beak, etc.) and glue them to the figure.
- Eyes, mouth and nose can be cut out of cardboard and glued to create a beautiful hero’s face. Alternatively, these parts of the face can simply be drawn directly on Smesharik’s body using paints or felt-tip pens. It all depends on your desire and the desire of the child.
Now the figurine is ready! Everything is very simple. You will get a round Smesharik.

Method 2.
For variety, you can also make square Smeshariki for younger children. To do this, you need to print the diagrams and cut out the parts. Then the figurine is assembled according to the instructions.
Method 3.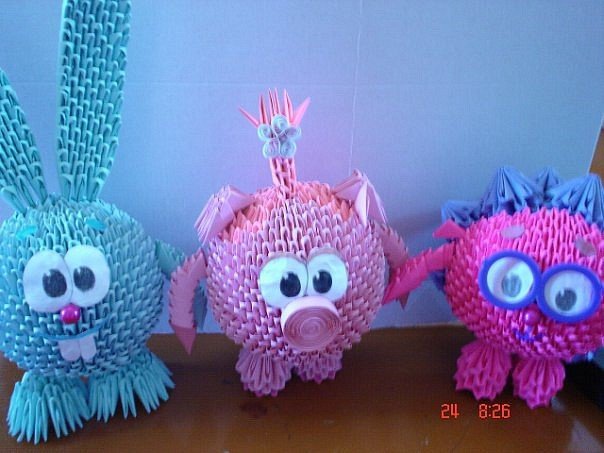
Now we’ll tell you some of the most difficult ways to make Smeshariki from paper. And here older guys will be your assistants. So let's get started.
Now we will teach you how to make Smeshariki using the modular origami technique. When using modular origami, several sheets of paper are required to fold the figure. Each sheet is folded into a module, and then all the modules are connected to each other. Such products will require much more patience and time from you.
If you decide to make Smeshariki this way, you will need the following:- Several sheets of thick colored paper
- Scissors
- First of all, we make the modules:
- To do this, divide a sheet of thick colored A4 paper into 16 equal parts and cut them out;
- fold each of the resulting rectangles in half;
- bend the edges towards the middle and turn the product over;
- lift the edges sticking out from under the triangle upward and bend the corners inward;
- bend the triangle in half.
- Add all other modules using the above method.
- We insert the resulting modules into each other. At the same time, we get a three-dimensional figure of Smesharik. We make a circle of 24 modules and increase the rows (approximately 12 rows need to be made).
- After this labor-intensive work is completed, we add ears, paws, spines, horns, hats and other details that your hero needs. The eyes can be cut out of cardboard and glued to the figure.
All is ready!

I would like to tell you about another, difficult, but interesting way of making Smeshariki from papier-mâché. This is a very labor-intensive process. And it needs to be done by adults. A very difficult, not cheap, but quite interesting method! And it's worth it!
For this method we will need:- Balloon
- Newspapers
- PVA glue
- Scotch
- Egg Tray
- Facade putty
- Tile adhesive
- Wire
- Hot water
- Cold water
- Drill
- Mixer whisk
- Paints
- Tassels
- We inflate the balloon of the size we need.
- We tear the newspaper into small pieces, soak them in water and cover the ball with one layer. Then we take PVA glue and water in a 1:1 ratio and also soak pieces of newspaper in the solution. We glue the second layer in PVA, while leveling it with a brush and expelling the air. We do this for about five or six layers. Dry until completely dry.
- When our design is dry, we burst the ball and fill the inside of the newspaper ball we received with paper. Or you can fill it up, your imagination and possibilities. For example, dried egg racks into small pieces.
- We twist the arms and legs, as well as the snout, from the newspaper and glue it all to the ball with tape.
- Now we are preparing the mass with which we will strengthen our ball:
Take an egg tray and tear it into small pieces, pour hot water over it to boil quickly. Place it on the gas stove and wait for it to boil. Boil for about 20 minutes. Remove from heat.
We take a device for whipping: a drill and a whisk from a mixer. Let's start whisking. First from the very bottom, lifting all the pieces, and then simply in a circular motion until you get a porridge-like mass. And put it on the fire again for about 10 minutes. Remove and beat again. When the mass becomes homogeneous, then leave it to cool.
- Take cold water and dilute the putty according to the instructions on the bag. If you use a five-liter bucket, then you need to pour about 1/4 of the bucket with cold water. We spread the putty. The solution should look like thick sour cream.
- Squeeze the mixture we cooked from the water. Add the squeezed mass to the putty and mix thoroughly. The result is a mass for sculpting our Smesharik. It is advisable to use this solution as soon as possible, because after a while it starts to dry out.
- First, apply a layer of approximately 1-2 mm to the ball. Give it time to dry. When this layer is completely dry, apply a second one - this one is more dense. We do this to increase the strength of our creation.
- We make a ponytail, hair from wire, and attach it all. We form the ears and cover it all with our mixture, sculpting and giving it the correct shape. Don't forget about the hooves on the arms and legs. Leave until completely dry.
- We dilute the tile adhesive to the consistency of thick sour cream. And we coat our Smesharik with it.
- After drying, the painting process begins. There are simply no limits to your imagination here...

The resulting Smesharik can decorate a children's room and even a playground in the yard.
This process is very labor-intensive, but we hope that its outcome will bring everyone a good mood and a lot of positivity.
We introduced you to ways of making wonderful cartoon characters Smeshariki with your own hands. Choose the one that suits you and go for it!
Good luck! And may everything work out for you!
Video on the topic of the article
Smeshariki are the favorite cartoon characters of modern children. A distinctive feature of this cartoon is its excellent humor, which will appeal to adults too. And since parents can watch this animated series together with their children, then making a beautiful craft with their own hands will not be difficult for them together. In this article you will learn how to make Smesharik from paper. Such time together will be a great reason to get even closer and have a great evening.
How to make a Smesharik from paper and CDs
Since all Smeshariki are round in shape, you can experiment a lot with the base for their body. Children and their parents create these characters from fruits and vegetables, from balls of yarn, from balloons and even from CDs. In order to make such a craft, you need to have a couple of CDs, colored paper and a glue stick.
First, think about the composition: how your Smesharik will stand, what it will be in his hands, then cut out the arms and legs of the hero, then the details of the image. Place all the parts on the disk and glue them. You can complicate the craft and add other materials besides paper: make Nyusha’s nose out of a button and glue an artificial flower onto her head, stick a voluminous pompom onto Sovunya’s hat. Experiment!
Smeshariki masks
Another idea for paper crafts for Smeshariki lovers is masks that you will not only enjoy making, but also have fun playing with them later. In order to please your child with such a mask, you need to save the picture that will be located below and simply print it on a color printer. Then cut out the mask you like, glue it onto thick cardboard and glue a thin elastic band to it. Ready! Now you can set up a whole theater where you can transform into any hero. If you don’t have a color printer, it doesn’t matter! Just redraw the mask on a white sheet of thick paper and repeat the procedure with an elastic band!

How to make a Smesharik from paper with your own hands: applications of heroes
In order to create a funny application in the shape of Smesharik with your child, you also need to print out the templates below on a color printer. It is best to stick them on thick paper or cardboard using a glue stick. When working with PVA glue, the design may become smudged.

This kind of work develops thinking, as it is reminiscent of putting together puzzles. Be with your child while creating the work and help him find the right element!
And here are a few more templates for other Smeshariki! Create together!

Come up with your own interesting ideas for creating paper Smeshariki crafts! Try to create voluminous works, give your child complete freedom in this exciting form of creativity.
Which child doesn't like watching cartoons? You probably won't find many of these. For example, the kids really liked the animated film “Smeshariki”. But you shouldn’t let your children sit in front of the TV screen for a long time, because... this can negatively affect their health. But how can we tear them away from their favorite characters on TV screens? And there is a solution to this issue! Invite the children to make Smeshariki quickly and easily with their own hands.
I think that this proposal will be accepted by the children with great pleasure! Adults, of course, will need to spend a little of their time to help their child if necessary. But this is a very interesting and useful activity! After all, such work will help your child develop creatively. The child will be able to dream up a little. The more parents devote time to their children, the stronger and happier the family.
There is nothing complicated about making Smeshariki with children with your own hands. And most importantly, you can choose the most acceptable, cheapest and most interesting way for you to create these characters from your favorite cartoon. The image of Smeshariki is reflected in different types of needlework.
Today we will tell you about several simple options for making heroes with your own hands together with your children.
Making Smeshariki with your own hands from CDs in MK
For example, Smeshariki from disks. In every home you can find old disks that you no longer use.
For work we will need:
- Old disks
- Colored cardboard
- Colored paper
- PVA glue
- Scissors
- Markers
Let's get to work with you.
Be sure to let your child choose the character they want to make first. It is very important!!!
To make any cartoon character, be it Nyusha, Krosh or Sovunya, we need to do the following:
- Cut out eyes, a nose, a mouth, cheeks, hairs, a hat, flowers and other necessary elements from colored paper, depending on the character chosen by the child (or you).
- Cut out ears, arms, legs from colored cardboard.
- To make Smeshariki’s facial features clearer, outline the contours of the details with felt-tip pens.
- Glue all the finished elements onto the disk with PVA glue.
There you go!

Ideas can be taken from drawings in regular coloring books, you can even use them as a template.
We try to cut out from cardboard those parts that will protrude beyond the disk itself. And what will be completely on the disk is best made from colored paper.
Your favorite cartoon characters can be made from many materials found in nature. These can be vegetables, fruits, chestnuts, acorns. The list can go on for a very long time. What is your imagination enough for...

We make various Smeshariki from natural materials
Smeshariki from natural material are created very simply. Of course, it will be interesting and useful for children to make Smeshariki from vegetables and fruits with their own hands using plasticine. This is a great way to spend more time with your child. Such work broadens children's horizons, develops their speech, thinking and fine motor skills.
We will make several of our characters.
To work we need:
- Green apple
- Pear, 2 pieces
- Fresh potatoes, 3 pieces
- Head of cabbage
- Boiled egg
- Black olives
- Ketchup
- Tomato
- Scissors
- Bright and soft plasticine
- Board for working with plasticine
- Toothpicks
Let's get to work.
- To make a teddy bear we use a small potato. We attach ears and a hat made of red plasticine to it. We make eyes from white circles, and pupils from black circles. Then we sculpt the character’s smile, nose and mouth. The main thing is that our Smesharik smiles!
- We will make moose from a large onion. Using plasticine we create a nose, mouth and tongue and ears. We fashion the horns and attach them to the vegetable.
- Let's make a pig from a green apple. We sculpt the eyes, snout and mouth. We make small ears from plasticine. We knit a small pink braid from wire, lace or yarn. Using a toothpick, attach it to the crown.
- A rabbit can be made from a pear. Turn the pear over. We sculpt big ears. We make eyes, a nose and always two snow-white teeth. Do-it-yourself mixed vegetables and fruits are ready!
- Creating cabbage crumbs is also very simple. To do this, take cabbage forks and break off two leaves. They will serve as ears for the future craft. Cut two potatoes in half. Two parts will serve as paws, the other two as arms. Cut the boiled egg and attach it to the cabbage using toothpicks. Attach black olives to the top. We make the nose from a tomato. We draw a smile with ketchup.
So our Krosh is ready!
Photo for inspiration:


Characters can also be crocheted. You can find master classes at the end of the article.
And if you are into sewing, here are the patterns that will help you sew these cuties.

Let your imagination be limitless. Go for it and you will succeed!
A couple of videos on the topic


