Do-it-yourself Dog toy made from scraps of fabric. Master class with step-by-step photos. Crafts from scraps of fabric Cat from a square piece of fabric step by step
Welcome to my workshop! Today we will be doing creative work with our little ones again! On our agenda is... I suggest trying to do it in several versions.
- different fabrics,
- cat patterns to get different models,
- and methods of decoration.
So, go ahead!
Craft material
Since our fluffy will be made of fabric, let's see what material is suitable.
Can be made from:
- Plain or multi-colored fabrics;
- Thin chintz and thick denim. But it’s better not to use stretchable knitwear if you want the shape of the craft to be preserved.


Think about what you will use to connect the parts, because the craft will be voluminous. And for this you need at least 2 parts, and filler between them. How to connect:
- Glue. Preferably one that grabs quickly and holds for a long time.
- Threads. How to sew under the tree? It's easier to do this with a sewing machine. But you can do it with your hands.
Filler:
- Cotton wool;
- Sintepon;
- Small cereals, such as millet, buckwheat, rice or peas;
- Sawdust is an ideal option if you want to add essential oils and use the cat as an aroma;
- Silicone balls.
You need to fill it tightly enough, stuffing and compacting the material.


Let's diversify models
If you do it with your baby, think that he with your own hands can make it. From here the complexity of the toy will depend.
Perhaps it will be:

Take into account the age, abilities, and perseverance of your baby if you do it with your child so that it is interesting for him.
Let's decorate our cats
If cat We have already sewn it, we need to decorate it. How to do it?
Let's look at the options:
- Using simple threads, embroider “eyes”, “nose”, “whiskers” and “smile” on the face of the fluffy;
- Make a cute bow on your ears, neck or tail;
- Button eyes will look great;
- Valentine's card or a flower in the paws of a mustachioed tabby will be very useful.
Now that we have disassembled all the components, let's start manufacturing together toys.
Pattern
You can print out the patterns, you can draw them yourself - it’s not difficult to draw a cat without details, or we can trace any cat we like on the screen (we put the sheet to the screen and trace it directly on it, as we used to do on the translation window). Pictures enlarge by click


Step-by-step photo of making a March cat

I will try not only to describe in words what we will do with my baby, but also to include photo so that the sequence of actions is clear.
We will need:
- Paper;
- Pencil;
- Textile;
- Threads;
- Ribbon;
- Scissors;
- Needle;
- Chalk or soap for cutting;
- Felt pen.

And now about the work step by step.
- Draw each detail on paper and cut it out. What details do we need to draw: head, ears, paws, tail, body.

- Fold the fabric in half. Using patterns, cut out parts of the product, 2 identical pieces for each part, only 4 legs for each pair and ears. To “hold” each part to the other, we pin it with pins.

- Sew each part, leaving a small gap.

- Turn out the parts and fill them with cotton wool. The cotton wool needs to be torn off in small pieces and pushed in tightly.

- Sew the holes with a hidden seam.

- Sew all the parts in place. The ears are gathered a little, and only then are they sewn on. It will look like they are a little voluminous.

- Draw eyes and a nose with a felt-tip pen. Don't forget the mustache!

- Decorating the cat.
We make “fingers” on the paws by sewing them with a couple of stitches.

We tie a bow and hand over a flower!

Our kitten is ready! It is not sewn very neatly, but please make a discount on what the kids made! If you sew yourself, then of course it will turn out much neater.
It was a pleasure to collaborate with you! Subscribe and visit other articles with crafts, I briefly call them My Workshop! Take a look Show it to your friends so they can make crafts with us too. That's all for today! Bye bye!
Also visit the articles

Here you will find 4 simple master classes, and 3 of them do not even require sewing!
Subject : Cat toy made from a square of fabric.
Target : Sewing a cat toy from a square of fabric.
Tasks:
1.Teach students to use scraps of fabric to make crafts.
2. Encourage a creative approach to completing a task.
3. To instill in students thrift and accuracy, and the ability to finish what they start.
The planned outcome of training, including the formation of a learning management system.
Equipment:
Verbal (conversation, explanation);
Visual (demonstration of a sample, photographs of the manufacturing sequence of the product, diagrams);
Practical (game, exercise, practical task);
Partially - search (determining the sequence of sewing a toy from photographs).
scraps of knitted fabric, sewing needle, threads to match the fabric, padding polyester for stuffing, scissors, buttons for the eyes, dark yarn for the mustache.
Lesson stage
Org. moment
Updating knowledge
Statements of new
Material
Sample Analysis
Fizminutka
Safety precautions
Practical work
Lesson summary
UUD
Teacher activities
Hello guys. Glad to see you in class. My name is Evgenia Sergeevna, today we will sew with you!
You will find out what we will be making in class today by listening to the poem.
New Year, New Year,
And under the tree there is a red cat.
Eyes like light bulbs
The paws are like cotton wool.
Apparently the cunning cat knows
What does he need for the New Year?
Good Santa Claus
He brought a mouse in a mitten
There are situations when you can’t keep a cat at home, then fabric and a little free time will come to the rescue to sew a cat toy. Let's remember what qualities cats have - they are affectionate, fluffy, soft
Today each of you will have the opportunity to make your own cat.
Let's look at a sample toy. What parts does it consist of? Correctly ears, tail, mustache, eyes.
Guys, let's take a break and get to work. (physics minutes are displayed on the interactive board)
Do not stick a needle into clothing.
Keep the needle only in the needle bed.
Do not leave open scissors on the table.
You cannot get up from your seats and walk around with the scissor blades open.
During the work, I pay attention to compliance with safety precautions and compliance with the sequence of execution of the toy.
The fabric for a soft toy should not fray and should not be very thick, size 15 * 15 cm.
Fold the corner to the wrong side. Fold it in half and stitch along the basting line. Turn it inside out and stuff it a little with padding polyester. Where the seam is is the front side of our craft. We connect the very edge of the seam and the middle of the back edge, fastening it with several stitches. We got ears. Tail. Sew from the beginning of the corner to the middle of the line, tucking the edges inward. We tuck the edges and use the same thread to fasten the place where we stopped with the seam on the front. We lay the tail on its side so that the kitten can sit, and secure it with several stitches. Mustache. We wrap threads of a contrasting color around two fingers, tie them in the middle, and cut off the ends. Glue or sew on the eyes and nose.
Well, now each of you has your own pet cat. Thank you all, goodbye.
Student activity
You can sew beautiful, bright and unusual toys with your own hands from leftover fabric using the patchwork technique (from the words patch - a piece of fabric, work - work). The art of sewing from scraps is popular all over the world. Sometimes entire works of art are created from small pieces of fabric. In every home you can see a bedspread, cape or rug, sewn from pieces of fabric with your own hands by your mother or grandmother.
Recently, sewing toys from scraps has become very popular. Children love to play with rag toys, especially if they are sewn with the kind hands of their mother. Funny dolls and animals made from colorful pieces of fabric fill your home with warmth and comfort, delighting your family and friends with their cute charm.
Any housewife in her house will always have a considerable number of multi-colored pieces of fabric left over from sewing some things. To make a rag toy, scraps of all types of fabrics of different sizes and colors are useful. The patchwork technique is not at all difficult to master if you have a sewing machine, a little free time and a great desire to create.
Tools and materials
The good thing about the patchwork technique is that it does not require special tools or large financial outlays. To make a toy from leftover fabric, you will need tools and materials that every needlewoman always has on hand:
- Scissors, sewing needle, sewing machine, safety pins, multi-colored threads, thimble.
- Cardboard, tailor's chalk, pencil, tailor's measuring tape, triangle ruler.
- A few remnants of fabric, buttons, padding polyester for stuffing, braid, beads and other decorative elements for decoration.

Sewing a toy from leftover fabric begins with a pattern. Schemes describing the work can be found in needlework magazines or on Internet sites. The algorithm for sewing patchwork toys with your own hands is almost always the same:
- Having chosen a toy model, we make its pattern out of paper.
- Using a chalk, we transfer the details of the paper pattern onto the pieces of fabric.
- We cut out the outlined parts from the fabric and sew them according to the pattern, leaving holes for stuffing.
- Then we stuff the toy with padding polyester, sew on the eyes, nose, mouth and decorations.
Using your imagination and skill, you can create real miracles with your own hands from a few pieces of fabric. But we want to tell you a few secrets that will help your creations become even more beautiful:
- It is best to make patterns on cardboard, then they will lie tightly on the fabric.
- It is advisable to draw on fabric only with tailor's chalk, pencil or a piece of soap.
- You need to cut out the parts of the toy along the grain thread to avoid warping the fabric.
- It is undesirable to use cotton wool as a filler for toys, because when wet it can mat and the toy will lose its appearance.
- Instead of padding polyester, you can use small beads for stuffing, which will be useful for developing the motor skills of a child’s hands.
- If you have an old, out-of-shape toy in your house, you can tear it apart and get a great toy pattern. By applying your imagination and slightly changing its details, you can sew your own unique masterpiece.
For a more detailed study of the patchwork technique, we bring to your attention several original lessons and ideas for making toys from scraps with your own hands.
Rainbow fish made from patchwork using the patchwork technique - master class
We will need: several bright remnants of fabric, a piece of felt, padding polyester, safety pins, two buttons, a sewing machine.
Step one: We print the pattern using a printer and cut out the details of the fish from paper. The pattern is given with seam allowances.
Step two: Having attached the details of the patterns to the scraps, outline them with chalk and cut them out. Draw a heart on a piece of felt and cut it out as well. Having folded the fabric in half, we cut out and cut out 4 parts of the fins, as shown in the diagram. In the same way, we cut out 5 scales, sew them along the contour, turn them inside out and stuff a little padding polyester into them.
Step three: We pin one pair of scales to half of the fish’s body. We pin the fish part on top of the scales as shown in the diagram, stitch it together with the scales and turn it away. Then we pin three more scales.
Step four: We place the fish's head on top of the scales, stitch it and turn it away. In the same sequence we sew on the fins stuffed with synthetic padding. We place the sewn half of the fish with the front side on the fabric. We sew all the parts along the contour, leaving the tail unstitched, and cut it out. In rounded areas, we make notches on the seam allowances so that the seams do not pull together.
Step five: turn the sewn fish inside out and stuff it with padding polyester. We sew up the tail sections by hand, as shown in the diagram. Sew a felt heart onto the tail. Then we sew on the eye buttons. The cheerful bright fish, made by yourself, is ready.
Funny elephants using patchwork technique - master class

We will need: a few scraps of fabric, pattern paper, scissors, safety pins, and a sewing machine.

Operating procedure:

- We transfer the patterns to pieces of fabric and cut out the details.
- Then we make ears and sew them to the elephant’s body.
- Next we sew the remaining parts together, leaving a hole for stuffing, as shown in the diagram.
- Then we stuff the elephant with padding polyester, sew up the hole and sew on the eyes.
Fabric Toy Ideas
Patchwork cat

We will need: several multi-colored pieces of any fabric, scissors, pattern paper, floss thread, sewing machine.
The cat pillow is easy and quick to sew: according to the pattern, cut out the parts of the cat of the size you need on the fabric, sew them together, stuff them with filling and embroider the eyes, nose and mouth. It is not necessary to make the cat tabby. You can make it spotted, plain, or sew hearts on the back. In any case, he will turn out to be very charming. You can not only play with such a cute toy, but also use it as a pillow.
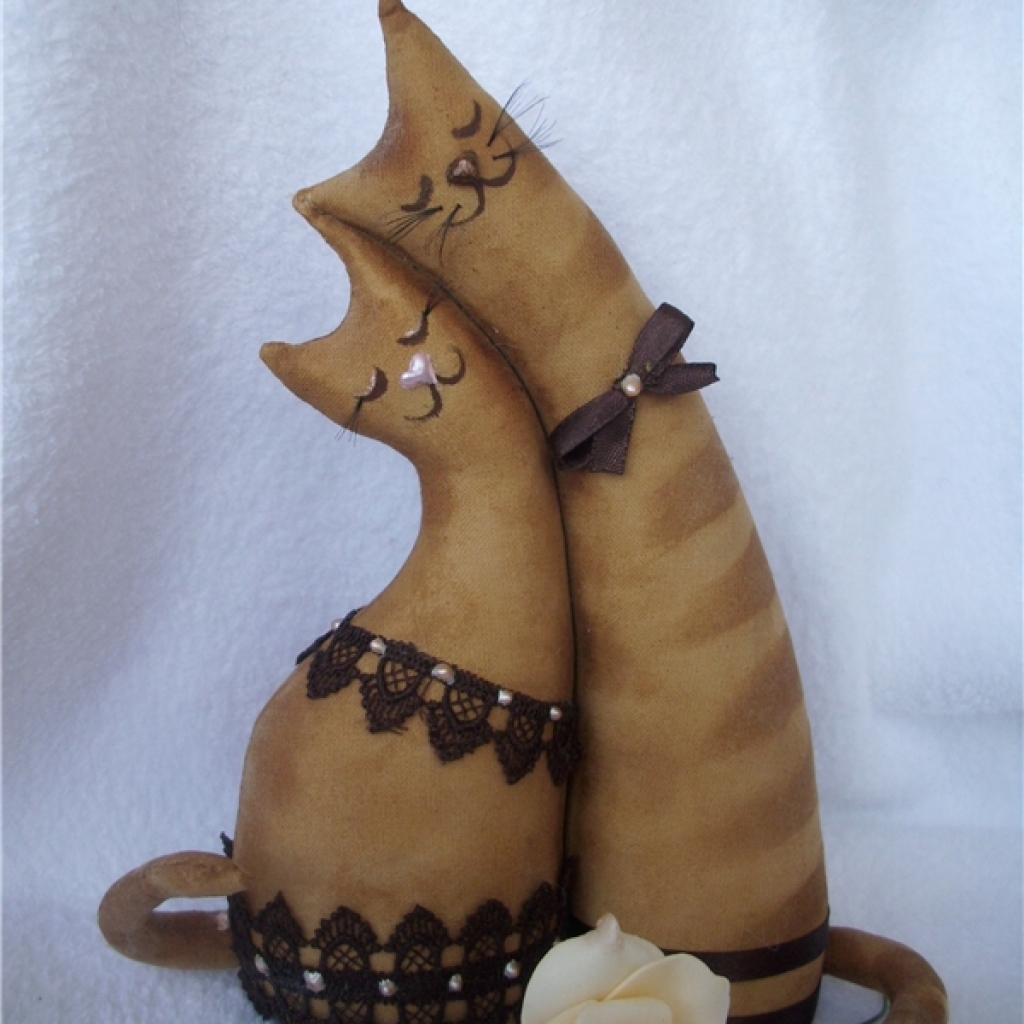
Kitty with a flower

We will need: a few remnants of checkered or polka dot fabric, pattern paper, a sewing machine, floss threads, beads, buttons and ribbons for decoration.
Procedure: we cut out the parts of the cat on the fabric according to the pattern, sew them together, stuff them with synthetic padding, sew on the eyes, embroider the mouth and nose. We decorate the cat at our own discretion. Her neck can be decorated with cute flowers or cute bows.
Fabric farm
By drawing your own sketches, you can make a whole collection of simple funny animals from colorful scraps.

From the remnants of felt fabric, using limitless imagination, you can sew a funny finger puppet theater.

Whole family of colorful parrots will live in your home if you decide to sew such patchwork birds with your own hands.

So cute dog will delight all your household members.

Having studied our lessons and gained experience, you can set your sights on sewing such colorful and fun airplanes.

Making toys from scraps with your own hands is an extremely exciting process. We hope that after mastering a few lessons, using our tips and using your rich imagination as an assistant, you will learn how to create unique toys using the patchwork technique.
Nowadays, fabric is used not only for room decoration, for its intended purpose, but also in the form of various homemade elements and crafts: soft toys, paintings, decorative items, flowers and decorations.

Dining table decoration
To decorate the dining table, do-it-yourself fabric crafts are suitable, for which you will need the following: skewers, colored fabric strips, threads to match the ribbons, needles, a glue gun, scissors with a wavy or zigzag blade, beautiful buttons or beads.

Now follow these steps sequentially:
- make a blank of strips of fabric measuring 25x5 cm, cut it around the perimeter with scissors with a wavy or zigzag blade so that the edge is not straight;
- Fold the prepared strip of fabric in half with the wrong side facing inward. Using a baste, gather the resulting double folded edge of the fabric. The basting stitches should be made the same so that the flower turns out symmetrical and neat. At the very end of the basting, pull the fabric so that the ends of the fabric meet and form a circle. Be sure to sew the ends of the fabric where they join.
- insert the skewer inside the fabric circle, between their reverse sides, and secure with glue.
- decorate the core beautifully with beads or shiny buttons using a glue gun, at the same time hiding the seam.
Women's fabric jewelry
For fabric decor you will need: stretch or lycra in bright colors, a decorative chain, fasteners or miniature locks, a glue gun, wire cutters and scissors.

Now we begin the process itself.

Fabric preparation. Cut the fabric into strips 1-1.5 cm wide. Take them by the edges and stretch them lengthwise so that the edge is wrapped in the form of a cord.

Weaving process. You can weave in various ways without restrictions or established rules. You can even use the technique of weaving baubles, or use knitting needles (crochet), or simply weave braids.
The more confusing elements there are, the more spectacular and fashionable it will look. Don't forget to leave small ends for attaching them to the chain.

Attachment to chain. Attach the woven creation to the chain, choosing the required length of the necklace. Make a clasp or lock on the chain.

Fabric toys
Fabric toys are still in fashion. For example, a couple of tilde bears, he and she. To do this, you should prepare: 2 pieces of white calico. 30x30 cm, a piece of calico with a fine pattern in blue, a piece of calico with a fine pattern in pink, threads of appropriate colors, padding polyester (silicone or holofiber), a simple pencil, scissors, needles, cutting paper, sewing machine (but you can sew by hand) .
White calico must be repainted light beige. For him it’s darker, for her it’s lighter. The following mixture will help you with this: dissolve 3 tsp in 3 cups of boiling water. coffee and 1 tsp. PVA glue and rock salt.

You need to immerse the fabric in it and hold it for dyeing until the mixture cools naturally. Then straighten the fabric, dry it and iron it.

To get a light tone, instead of coffee, use 2-3 tea bags.

Prepare patterns for the future product in advance and cut the fabric according to them. Control the direction of the fabric during the cutting process.

Sew identical paired elements on a machine or sew by hand. The hearts need to be stitched and turned out through the hole left for this.

It is enough to leave no more than 3 cm of fabric at the seams; it is better to trim off the excess.
Note!


We stuff all the resulting elements with padding polyester or similar material. For your convenience, it is worth doing this during the process of stitching the elements.
Do not over-stuff the arms and legs of the product so that it can be easily seated.

The elements of the product must be sewn from top to bottom. First the ears to the head, then the head to the body. The paws are secured with hidden seams and threads to match the fabric to make them invisible.

The eyes and nose of the bears must be embroidered with threads in the form of knots. Highlight the cheeks with regular decorative blush. Patches and hearts are attached to finished products, having previously been stuffed with padding polyester.

Crafts-flowers
Basically, flowers are made from worn children's clothes made from natural cotton fabrics, since children grow up quickly and the clothes remain.

Note!

Bright fabrics with floral or plant colors are ideal; a graphic design will also work.

To cut fabric you will need templates. From these, cut out two large flowers, four smaller ones and one from felt fabric for the base of the flower, which will support the petals and shape the appearance.

Place a couple of the largest petals on a felt base, then, as the size decreases, fold the remaining small petals in four.
Fix the petals together either by hand or with a machine. To decorate the center, cover the button with fabric and sew in the center. A regular button, beads or beads will also work.

Fabric panel
As a craft for your home, create a fabric panel. This is not at all difficult to do. All you need is desire and imagination, and this can be realized with the help of available materials.

You can create many DIY crafts from denim: jewelry, toys, bags, wallets, paintings, etc.
Note!


Fabric crafts can be given to children, relatives, friends and acquaintances. A gift made with love and with your own hands is the best!

Photos of fabric crafts


